 |
Some Thoughts On Zeroing
Properly zeroing one's firearms is of paramount importance. As received from the factory, firearms have only a rudimentary "zero" if any, which may or may not correspond to where the bullet will actually impact when fired by a given individual. Thus it is necessary to establish a proper zero with your firearm using your particular ammunition. In addition, you have to zero your firearm yourself because each individual holds a firearm differently which can affect where the bullet strikes. While someone may be able to come close to your zero you will need to fine tune it personally.
While this page is primarily directed toward rifle users the techniques are adaptable to handguns. I also assume in this discussion that you know proper sight alignment, trigger control, and proper shooting positions, and that all screws and mounts are secure and properly torqued.. If you don't know these things you will have a hard time zeroing any firearm, and then even if you achieve a zero you'll have a hard time hitting anything. This is especially true if you have poor trigger control. [I have a friend who was complaining to me that his fixed sight pistol was shooting very low and to the left. I tried it and it was dead on. I then watched him shoot it and saw him not only jerking the trigger but also convulsing his grip. I worked with him to overcome those problems and the pistol was dead on for him too.] I see similar things with rifle shooters too.
You also have to put the firearm in the "natural point of aim." That is, while the firearm is on the rest, if you let go of it, it should stay very close to where you aimed it. If you have to wrestle the firearm to point at your target you will have a difficult time zeroing it.
The first step in achieving a zero is to get the strike of the bullet close to where you want it. In order to do this expeditiously you will need to know the amount of movement provide by your sighting device per graduation of its dial or mechanical "click." This information is available from your sight's manufacturer. Keep in mind that most devices are calibrated to give a specific movement at 100 yards and that if you shoot at a shorter range that the movement is proportionally reduced. The chart below shows what happens.
| Movement per
graduation or click at 100 yd |
Movement at 50 yd |
Movement at 25 yd |
| 1 inch | .5 | .25 (1/4") |
| .5 inch | .25 | .125 (1/8") |
| .25 inch | .125 | .063 (1/16") |
Thus if you are shooting at 25 yards with a sight graduated in 1" marks or "mechanical "clicks" for 100 yd and you are 2 inches off of your point of aim at 25 yd you will need to move your sight's adjustment eight (8) graduations or clicks.
For fixed sights the problem is a little different since you need to either physically move the rear sight for deflection or alter the height of either the front or rear sight for elevation. The formula to determine the amount of adjustment is:
M = S * D / (R * 12)
Where:
M = amount of movement or change in sight height needed (in inches)
D = distance in inches need to move the bullet's strike to hit point of aim
R = range to target in FEET
S = distance between the front edge of the rear sight and the rear edge of the front sight blade (in inches)
Note that to move a bullets strike horizontally move the rear sight in the direction you need to go. To adjust elevation either lower the front sight or raise the rear sight to raise the bullets impact, or raise the front sight or lower the rear sight to lower the bullet's impact. As an example if your sight radius is 5" and you need to move the bullet's strike 3" higher at 25 yd (75 feet):
M = 5 * 3 / (75 *12) = .016
thus you need to lower the front sight (or raise the rear sight) by .016 inches.
Getting on the (center of the) Paper
Now that you know how to make the adjustments you need to first get the bullet's strike close to where you want it and to then refine your zero. It helps if you have a good ballistics program like ShootingLabTM to compute trajectory data so you know where you should be at a given range.
Most folks will do a zero (or at least an initial zero) at 25 yards and then go from there. The military does this. However, if you stop there you can still be way off at longer ranges. The procedures below are much better.
You can start in one of several ways.
The Quickie (I)
(This is my preferred method when I have a solid bench.)
a) Using your best shooting technique on a solid bench and rest, fire one shot at a distinct aiming point on a target at 100 yards from the bench.
b) Sandbag your rifle so that the crosshairs are on your original aiming point.
c) Without moving your rifle, adjust the crosshairs so they are centered on the bullet hole.
d) Fire one round at the aiming point. It should be dead on. You can then make a compensating elevation adjustment to get your long range zero.
I once did this with a friends rifle, dialed in 2 inches of elevation along with the first adjustment and got a perfect 250 yard zero with just 2 shots. He was impressed (and so was I). The best way to do this procedure using several sand bags so you can "lock" the rifle into position. There is also a product called "Bulls Bag" (www.bullsbag.com) that works very well with this method.
The Quickie (II)
With a firearm that allows a direct view through the bore you
can carefully sandbag the firearm in place, look through the bore, and then
(without moving the firearm) adjust the sights to intersect the center of the
bore's view.
a) Set up a bullseye target at 25 yards from the bench.
b) Remove the bolt from the rifle.
c) Sand bag the rifle on the bench, look through the chamber end and adjust the rifle until the bore aligns with the bullseye.
d) Without moving the rifle adjust the scope until the crosshairs center the bullseye. It takes a few back-and-forth looks and adjustments until you're fairly sure both the bore and the crosshairs center the bullseye at the same time. (With a variable power scope, use a lower power setting.) Then replace the bolt.
e) Move the target to 100 yards, crank up the scope power, center the crosshairs and fire a shot. Usually the bullet will hit from 3 to 3 1/2 inches high, just about where you want it to be. Then fire one or two scope adjustment shots as needed to put the bullet hole where you want it.
If your technique is very good it is possible to have your desired zero in 3 to 4 shots, although you should fire a multi-shot group at the furthest range you can to verify things.
Use a Collimator
Use an optical such as the one made by
Bushnell. A collimator is simply an optical device which consists of an
optical "head" and an adjustable rod which fits the bore of the
firearm tightly and which creates an image of a target at "infinity"
that you can use to adjust your sights. Follow the manufacturer's
instructions for use, and with the collimator in place adjust your sights to
center them on the collimator's reticle. Then proceed from step e, below. These devices are primarily used
with rifles, and are more properly used to verify an existing zero after traveling.
They have been pretty much displaced by laser bore sights.
|
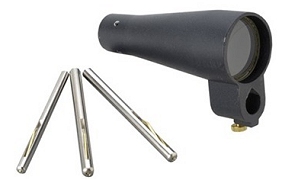
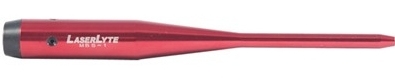
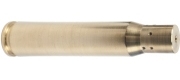
Use a Bore Sight Laser Device
These can range from a cartridge like device that contains a laser and that you
insert into the chamber, to a laser module mounted on a bore rod that you insert
in the muzzle. The useful range of these is generally limited to under
about 50 yards in daylight. What I do is to determine the "near
zero" in question using ballistics software and then place the laser's
target at that range and adjust the sights so the dot and the sights
coincide. I then verify this with ammo at longer ranges. With the
"chamber units you want to mark the device so that you can orient it in the
same position every time you chamber it. I prefer the in-muzzle units as
they accommodate any barrel warpage.
 |
 |
|
Muzzle type and chamber type laser bore sight units |
|
The Old Fashion Way
You will need access to a range with at least 100
yards and preferably 200 yards, a shooting bench, and you will need to have
someone with you as a spotter with a spotting scope or binoculars. You
should start with your bore clean and dry and all sight mounting and stock
screws tight. Done at shorter ranges this procedure is suitable for
handguns and shotguns.
a) Pick out a distinct aiming point (not just a paper target) on your backstop, preferably at 200 yards. Holding dead center on the aiming point very carefully fire 1 round. If your spotter tells you that your shot was dead on or within an inch or two skip to step d.
b) Adjust your sights in the horizontal plane, using a bold correction, and fire one shot. Don't creep up on the aim point use bold adjustments. Once you have a "left" and "right" you can split the difference and be on target.
c) Adjust your sights in the vertical plane, using bold corrections, and fire one shot. Don't creep up on the aim point use bold adjustments. Once you have a "over" and an "under" you can split the difference and be on target. If steps 2 and 3 are done right you will be on target with a maximum of 4 shots.
d) Using a paper target with a distinct aiming point at 100 yards carefully fire two shots using your best bench technique. They should be very close to your aiming point. If your initial firing was at 200 yards the center of your two shots will be about 2.75" to 3" high at 100 yards. If your initial firing was at 100 yards you will be close to dead center. Make appropriate corrections to put your point of aim 2.75" to 3" or the distance you prefer, directly above your point of aim. Do not not make minor corrections to your scope. If you need to move the point of impact say 4 inches move 6 inches and then back 2 inches. Tap the side of your scope after making the adjustment to insure the reticle is centered and settled. Fire 2 more shots and repeat as necessary. Unless you do not not have a 200 yard range this step doesn't have to be perfect, just very close.
e) At 200 yards fire 3 shots as carefully as you can at a paper target with a distinct aiming point. The center of your group should be centered about or just slightly (about a inch and a half ) above your aiming point. If not make the appropriate corrections using a 3 shot group. At this step you want to be very precise.
f) Abandon the shooting bench. Set up a graphic target (animal or tactical) at 200 yards or as close as you can get to that range and from a field shooting position (sitting or prone work best) carefully fire a 5 shot group. Your 5 shots should be evenly grouped about your point of aim. If the group is larger than 10" fatigue has probably set in (or you are not the marksman you thought you are). Rest for 30 minutes think about trigger control and proper position and try again.
Using this procedure steps a through e you can get a bench zero on an unknown rifle with a little as 6 rounds if you are careful and maybe a maximum of 10 rounds. If you are simply changing your load with a previously zeroed rifle you can probably start with step 5.
If you don't have anyone to observe for you it may be necessary to fire at a paper target with a distinct aim point and a grid (possibly at a closer range--say 25 yd) and adjust the sights to center the shot.
Handguns should be fired either from a sand bagged rest or from the braced sitting position and shot initially at 50 yards (or 100 yards if you are really good). Shotguns with slugs should start at 75 yards.
Keep in mind that with all of the above techniques you have to shoot VERY carefully, holding the firearm consistently, and fire it without jerking the trigger or disturbing the sights. If you jerk the trigger you'll never be able to obtain a good zero.
Continue reading for information on refining your point of impact.
![]()
Zeroing Targets
Everyone has their own preference for a zeroing target, but round bullseye targets are not the best option as they don't give a precise horizontal and vertical index. It's probably easier to make your own targets for your specific sighting system, with reference marks dimensioned for your reticle's subtensions at the range you'll be shooting, so you can accurately place the crosshairs You want to be able to achieve repeatable, accurate, positioning of your sights, as well as have a visible indicator of where the point of impact should be at the range you are shooting at. The design of the original military zeroing targets for the M16 is fairly good if you scale them for the range you need, especially if you add some additional index markers along the side.
It's easy to make your own targets and grid using MS Word. Just fill the page with a table set to give 1/2" columns and rows, and fill in the desired cells with a black background and change the grid lines in the black area to white.
![]()
The Rifle
Please note that I have not rounded velocity and drop figures to eliminate meaningless precision as I have done on other of of my pages. It simply takes too much time to edit the tables. Keep in mind that knowing velocity within 10 f/s and drop within a 1/10th inch under 100 yards and within 1 inch past that range is precise enough for all but techno-weenies.
Too many shooters zero their rifles (for that matter, all their firearms) at too short a distance and thus lose the advantages of a more useful trajectory. For the most efficient use of trajectory you want to zero your firearm for the farthest distance over which the actual point of impact vs. point of aim will be within the critical (vital) zone of your expected target from the muzzle to as far away as possible. That is, the range at which the maximum ordinate or maximum height of the bullet's trajectory and the drop will not be greater than one half of the intended target's vital zone.
If you zero for too close a range you make hitting at greater distances much more difficult. While you may say, "but I'll never shoot anything at a greater distance" one never knows when that trophy buck or a target of opportunity may show up way over there. Since, with a proper zero one doesn't have to really worry about hold over (or under) until the ranges approach 300 yards away, why not take advantage of what you have, even if all you do is hunt in the thick brush of New England.

Your critical zone size will vary depending on your intended target but 6 inches in diameter is a good compromise for most uses. The table below gives the diameter of the vital zone and suggested maximum ordinate for some common game.
| Vital Zone Diameter | Suggested Maximum Ordinate | |
| Varmints and small game (Squirrels, woodchucks, etc) | 3" - 5" | 1.5" |
| Light game (small deer, wild boar, etc.) | 6" - 8" | 3" |
| Medium game (white tail or mule deer, bear, etc.) | 10" | 3" - 4" |
| Large game (Moose, elk,etc.) | 15" | 6" |
The table below, based upon the 7.62 mm NATO GI M80 ball round (G7 = .195) shows the effect of different zeroing ranges. The effect of differing zero ranges will still hold true, for other bullet weights and types. You can see that a good zeroing range for the .308 / 150 gr is somewhere between 200 and 250 yards depending on the individual projectile if we accept a vital zone diameter of between 6 and 8 inches. Interestingly this also works out very closely for other bullet weights and cartridges with a muzzle velocity in the range of 2400 to 2900 f/s. If we zero our rifles to be between 2¾ and 3¼ inches high at 100 yards we will pretty much be in the ball park no matter what bullet we zero with.
| Range | Vel. | 100 yd Zero |
200 yd Zero |
225 yd Zero | 250 yd Zero | 300 yd Zero |
| 0 | 2750 | -1.50 |
-1.50 |
-1.50 | -1.50 | -1.50 |
| 50 | 2634 | -0.12 |
0.87 |
1.20 | 1.55 | 2.30 |
| 100 | 2520 | 0 |
1.99 |
2.65 | 3.35 | 4.85 |
| 150 | 2410 | -1.25 |
1.75 |
2.73 | 3.78 | 6.03 |
| 200 | 2302 | -3.99 |
0 |
1.31 | 2.71 | 5.72 |
| 250 | 2197 | -8.37 |
-3.39 |
-1.74 | 0 | 3.76 |
| 300 | 2094 | -14.56 |
-8.58 |
-6.60 | -4.51 | 0 |
| 350 | 1995 | -22.73 |
-15.75 |
-13.45 | -11.00 | -5.74 |
| 400 | 1898 | -33.08 |
-25.10 |
-22.47 | -19.68 | -13.67 |
| 450 | 1803 | -45.85 |
-36.87 |
-33.92 | -30.78 | -24.01 |
| 500 | 1710 | -61.29 |
-51.32 |
-48.04 | -44.55 | -37.03 |
| 550 | 1619 | -79.72 |
-68.75 |
-65.13 | -61.30 | -53.03 |
| 600 | 1530 | -101.46 |
-89.49 |
-85.55 | -81.36 | -72.34 |
| MO = 0.1" @ 81.6 yd (Vital zone = .2") PBR = 108.5yd |
MO = 2.1"@ 117.2 yd (Vital zone = 4.2") PBR = 233.4 yd |
MO = 2.9" @ 130.4 yd (Vital zone = 5.8") PBR = 263.5 yd |
MO = 3.8" @ 141.7 yd (Vital zone = 7.6") PBR = 293.5 yd |
MO = 6.1" @ 166.7 yd (Vital zone = 12.2") PBR = 352.7 yd |
||
| MO = Maximum Ordinate PBR = Point Blank Range |
||||||
In the interest of completeness lets look at the effect of ballistic coefficient on optimum zero. In the table below I have taken the worst, average, and best case published ballistic coefficients for standard commercial .30 caliber 150 gr pointed (flat base and boat tail) bullets at a muzzle velocity of 2750 f/s and assumed a maximum ordinate of 3 inches.
| Effect of BC on
Optimum Zero Range and PB Range Commercial .30 cal 150 gr Pointed Bullets. MV = 2750 f/s 3" Maximum Ordinate |
|||
| Range | Path--Worst
Case (G1 = .301) |
Path--Average (G1 = .383) |
Path--Best
Case (G1 = . 435) |
| 0 | -1.50 | -1.50 | -1.50 |
| 50 | 1.28 | 1.26 | 1.24 |
| 100 | 2.78 | 2.76 | 2.74 |
| 150 | 2.84 | 2.88 | 2.89 |
| 200 | 1.27 | 1.51 | 1.59 |
| 250 | -2.14 | -1.52 | -1.29 |
| 300 | -7.62 | -6.36 | -5.88 |
| 350 | -15.45 | -13.21 | -12.34 |
| 400 | -25.98 | -22.27 | -20.83 |
| 450 | -39.58 | -33.77 | -31.55 |
| 500 | -56.69 | -47.99 | -44.69 |
| 550 | -77.82 | -65.22 | -60.49 |
| 600 | -103.55 | -85.79 | -79.20 |
| Zero = 222.2 yd PB = 259.4 yd MO = 3" @ 127.4 yd |
Zero = 228.4 yd PB = 267.6 yd MO = 3" @ 131.5 yd |
Zero = 231.1 yd PB = 271.1 yd MO = 3" @ 132 yd |
|
Notice that if one zeros to be about 2.75 inches or a little higher with any 150 gr pointed bullet that you will have pretty much an optimum zero assuming a 6 inch vital zone and have a point blank range of 265 yards ±. We could pick nits but for practical field use you'll be just fine. If we choose a different maximum ordinate things still hold up nicely.
If you would like to see similar runs for other bullet weights you can click here to view runs for 125 gr, 165 gr, and 180 gr bullets in .30 caliber.
If we are using a cartridge with a velocity substantially higher than the above we can use it to get a a longer point blank range by using the same 100 yard point of impact as above. If you want to refine things, this is a great reason to acquire a good ballistics program and by playing with different parameters you can learn a lot. I highly recommend RSI's Shooting Lab. (See my main ballistics page for details.)
To lazy to work out the details? Then zero rifles as follows, using the longer zero for the higher velocity range. This will at least get you close to a decent working zero for typical sporting firearms with sight heights of about 1.5".
| Muzzle Velocity (f/s) |
Suggested Zero Range (yd) |
| 1800 - 2400 | 175 - 225 |
| 2400 - 2900 | 225 - 250 |
| 2900 and higher | 250 - 300 |
Really quick and dirty. If you don't have access to long ranges, for most cartridges if you set your 100 yard point of impact to be about 2.5 to 3" high you should be good to go If you have a proper zero range you can apply an old rule of thumb for aiming at targets at an unknown range. First, estimate if the target is less than 300 yards distant or further than 300 yards. If under 300 yard hold dead center. If over hold at the top of the head. You should get a hit.
![]()
The Shotgun
Most folks think that the trajectory of the 12 gauge rifled slug is close to that of a mortar. Since they don't think they could hit anything past 25 or 50 yards (which is probably true if they don't have a set of sights on their shotgun) they zero for slugs at 25 yards. Unfortunately, this short zero severely limits the effectiveness of the slug firing shotgun. Surprisingly, a slug's trajectory is quite flat out to about 125 yards. The biggest limitation of the shotgun slug is that penetration and trajectory drop off drastically beyond 125 yards due to velocity loss, so its maximum effective range is probably about 125 yards. (I still wouldn't want to be hit by a slug at 200 yards though!)
12ga Foster Type Rifled Slug (G1 = .109)
(20" barreled riotgun with ghostring sights)
| Range | Velocity | Path Zero = 75 |
Path Zero = 100 |
| 0 | 1440 | -1.0 | -1.0 |
| 25 | 1320 | 0.7 | 1.4 |
| 50 | 1200 | 1.1 | 2.5 |
| 75 | 1120 | 0 | 2.1 |
| 100 | 1050 | -2.8 | 0 |
| 125 | 1000 | -7.5 | -4.0 |
| 150 | 960 | -14.4 | -10.2 |
While the 100 yard zero appears to be more useful than the 75 yard zero, the fact that most standard riotguns only will group into 8"-10" at 100 yards makes attaining a good 100 yard zero difficult unless sighted in at a shorter range with compensation for the distance. A lot of folks find it easier just to zero them for 2" high at 50 yards (at which distance group size is usually quite good) which gives about an 85 - 90 yard zero which is probably just fine. Using a properly zeroed shotgun and slugs with a good set of sights one can completely control their environment with a 125 yard radius.
By the way, for those of you interested in such things (even though at typical buckshot distances it doesn't matter) the G1 ballistic coefficients for buckshot are approximately: 1 buck - .036; 0 buck - .037; 00 buck - .038; and 000 buck - .042. Just for fun, here is the data on 00 buckshot. A 75 yd "zero" is assumed.
| 00 Buckshot Trajectory (G1 =.038) | ||
| Range | Velocity | Path Zero = 75 |
| 0 | 1290 | -1.0 |
| 25 | 1050 | 1.4 |
| 50 | 930 | 1.9 |
| 75 | 840 | 0 |
| 100 | 770 | -4.9 |
| 125 | 710 | -13 |
| 150 | 610 | -43 |
![]()
The Pistol
Most folks believe that pistols are only useable at very short ranges and thus zero them at very short ranges. As with rifled slugs in a shotgun, most people believe that pistol bullets have such a curved trajectory that long range hits are next to impossible for other than certain "never miss" gun writers and Uncle Elmer's 600 yard deer. (We'll ignore the silhouette shooters for the time being since that is a specialized activity, usually with optical sights and with equipment that often stretches the definition of "pistol."). While the handgun is primarily designed for use at short ranges (50 yards--and usually much less), don't feel under gunned if your target is at greater ranges (assuming that you know how to shoot) if you have a proper zero. The following table shows the trajectories of typical 9mm 125 gr, .357Mag 158 gr, and .45ACP 230 gr, and .44 Magnum 240 gr ammunition with a 50 yard zero and .8" sight height. (Note that the .44 Magnum can be usefully zeroed at 100 yd which will give it a maximum ordinate of about 2.6" at 56 yards and it will be about 9.8" low at 150 yards.)
Typical Handgun Ammunition Trajectories
| Range | 9 mm 125 gr |
.357 158 gr | .45 230 gr | .44 Mag 240 gr |
| 0 | -0.8 | -0.8 | -0.8 | -0.8 |
| 25 | 0.5 | 0.4 | 1.1 | .24 |
| 50 | ± | ± | ± | ± |
| 75 | -2.5 | -2.1 | -4.2 | -1.7 |
| 100 | -7.1 | -6.1 | -11.5 | -5 |
| 125 | -14.0 | -12.1 | -22.0 | -10 |
Long range defensive or long range hunting use of a pistol is not generally recommended except in dire straits. However, when the goblin is way out there near Fort Mudge and thinks he's out of harms way, if you hold on the head and carefully squeeeeeze one off you'll easily get a chest hit (and ruin his whole day) assuming you do your part. I once wowed a couple of MPs by getting 5 solid chest hits with 5 shots on an IPSC "option" silhouette at 100 yards using a Detonics pocket .45 from the braced sitting position. If I can do it so can you!
To email me click here
| Back to the Ballistics Main Page | Back to the Misc. Q&A Page | Back to Fr. Frog's Main Page |
Disclaimer
As far as I know all the information presented above is correct and I have attempted to insure that it is. However, I am not responsible for any errors, omissions, or damages resulting from the use or misuse of this information, nor for you doing something stupid with it. (Don't you hate these disclaimers? So do I, but there are people out there who refuse to be responsible for their own actions and who will sue anybody to make a buck.)
![]()
Updated 2016-04-01