 |
The Care and Feeding
of the AR/M16 Platform Rifles
(How to
live happily with your AR platform Homeland Defense Rifle, as well as some arcane
technical info)
This document is a work in process. It is designed to present useful information to users of the AR/M16 platform rifles, that will allow you to get the most from your rifle. Additional verified tips and ideas are welcome.
The Armalite AR-15/M16 series of rifles has become one of the most popular military rifles ever built, and the platform has become the "modern sporting rifle" (MSR) or the "America's Rifle" in the US. However, there are some tips and tricks that have been learned over the years, and that are still being learned, that make owning and using them easier. This document has been prepared with input from numerous sources including Pat Rogers, Ed Harris, Colt Firearms, the Gunsite Alumni List, plus various professional armorers, and trainers too numerous to mention, and my friends Tom G. and Paul M. who edited and cleaned up my typos.. I make no claim that these are absolutes and nor that I have discovered anything myself. You can ignore these suggestions, but you do so at your own peril. By the way, "AR" does not stand for "Assault Rifle," but rather "Armalite Rifle."
Before we continue....
According to some "experts" the AR/M16 is the worst military firearm ever fielded (with perhaps the exception of the horrendous French Chauchat light machine gun of WW I). While it is not the wonder design some claim, it is not a useless piece of crap and it has been in continuous service around the world for over 55 years. It is estimated that some 45+ million M16s and AR variants have been made and used in some 80 countries. However, just like the venerated M1 Garand, M14, and the 1903 Springfield rifles (how some people forget) it had some initial teething problems.
First, as originally introduced to the market the AR-15 had a conventional 1:14 twist barrel as that was the twist used in commercial .22 centerfire barrels at the time. Unfortunately, with this twist, the longer M193 FMJ-BT bullet was barely stable at normal temperatures and completely unstable below about 40 degrees F. In spite of the manufacturer's hype to the contrary, at low temperature, most rounds would not stay on target at 100 yards. It took publication of tests by the National Rifle Association to get this noticed and the rifling was then changed to 1:12 and stability problems ceased. The rifling twist change DID NOT affect the lethality of the cartridge, contrary to the rumor mills. [This was documented in the May, 1962 issue of The American Rifleman, in an article titled "The Armalite AR-15 Rifle," by Walter J. Howe and E.H. Harrison, page 17].
One of the persistent rumors about the M16 is that its bullet tumbles in flight. This is totally false. If a bullet tumbles in flight it will be highly inaccurate and most likely not even hit a target. As noted above, the original AR-15 with the 1:14" twist was accurate at warmer temperatures but when the temperatures got below 40 degrees F the bullet did begin to tumble in flight and hitting a 100 yard target was problematical. Properly stabilized in flight the fully jacketed projectiles of the 5.56 mm do in fact tumble, but upon impact. This characteristic is due to the fact that the projectile's center of gravity is towards the base of the bullet and upon impact the bullet yaws and the rear of the bullet rotates forward inducing tumbling. This is a known characteristic of modern pointed, non-expanding bullets. If the impact velocity is high enough the projectile can fragment and come apart as it tumbles.
Second, it was claimed that the rifle did not need to be cleaned and in fact cleaning supplies and lubricants were not even issued at first. (Folks forget that the training programs and manuals issued with the M1 Garand, M14, and 1903 Springfield recommend daily cleaning and lubrication.) This rumor probably got started because the inside of the gas tube was described as "self cleaning" and someone misunderstood that.
Third, the barrel and chamber were bare steel and while that might suffice if cleaned regularly in dry areas, in the humidity of Vietnam rust and corrosion resulted and were exacerbated by the small diameter of the bore and chamber. In addition many chambers were roughly finished.
Fourth, the rifle was designed around a non-canister IMR (stick) powder, 4475 (as well as 8208M), which operated the action properly and at the correct design pressures. In an effort to make high speed ammunition manufacturing easier, the military, without checking with the designer, changed to a non-canister ball powder, WW846, which was being used in the 7.62 mm NATO round. While it met chamber pressure and velocity specifications, the port pressure (gas system) was much higher than the design specs called for. This resulted in much faster and more violent cycling of the action, which caused extraction and wear issues. In addition, it was found that the new 846 powder generated very high levels of fouling to the point that it clogged the gas tube and fouled the bore and chamber. Further investigation by Frankford Arsenal, documented in their report Report R1936, M16 Rifle Gas Tube Fouling - Composition, Properties, and Means of Elimination, by L. Stiefel & B. Brodman, August 1969, determined that the level of calcium carbonate (CaCO3) used in the powder manufacturing process was way too high (up to 0.9 percent of the components). Calcium carbonate was used as a stabilizer and as a storage life enhancer. When the calcium carbonate was lowered to, or below, 0.25 percent the fouling issue disappeared without adversely affecting the stability or life of the powder or its other characteristics. (Winchester/Olin subsequently reduced the CaCO3 content of their ball powders across the board.)
Fifth, it was determined by military investigators that most of the troops issued the new rifle had very little, if any, training in its use or maintenance, and that few, if any, of the rifles issued had ever been zeroed. In fact, many had broken or missing front sights! In addition, the fact that the M16 had a full-auto setting caused most soldiers to fire only on full-auto with no regard to aiming at the target. [These issues are documented in the April, 1978 issue of The American Rifleman, in an article titled "Only Hits Count," by LTC Lones W. Wigger, Jr., page 16]
To correct all these problems, the barrel and chamber were hard chrome plated to resist rust and corrosion, and a change was made to the buffer system to reduce cycling speed. Cleaning and lubrication supplies were issued and maintenance and marksmanship training started. The use of only aimed semi-auto fire was encouraged and/or directed.
These changes turned the M16 into a much more reliable rifle. Interestingly the military, ever obsessed with white glove cleanliness, insisted that only minimal lubrication should be used. It began to be noticed that in dry dusty environments, and for that matter in normal use, that reliability was still not what was desired. Numerous independent tests and combat/range experience over the years showed that the M16 can run just fine when quite dirty if well lubed rather than dry, even in dusty conditions. The "generous lubrication" idea was recently (July 2010) acknowledged by the military. Tests showed that generously lubricated M4s and M16 have 94% fewer stoppages than lightly lubricated ones even in dusty conditions.
When NATO standardized on the steel penetrator SS109/M855 ammunition with its even longer bullet (about .93" for the M855 vs. .75" for the M193), the twist rate was further increased to 1:7, mainly to adequately stabilize the even longer (1.12") tracer projectile. While the M855 is stabilized in a 1:9, twist the 1:7 twist was adopted to ensure proper performance with either round. Again, the rifling twist change DID NOT have any significant effect on the lethality of the cartridge, contrary to the rumor mills, and the older M193 round actually exhibited a small increase in accuracy. The 1:7 twist is needed to stabilize the 77 gr MK 262 OTM round, and the new M855A1 steel core ball ammunition
The current 14.5" barreled M4 carbines and the commercial 16" versions run at quite high port pressures, especially with the M855, M855A1, and MK 262 rounds, because of the shortened gas tube which brings back the fast cycling problem. (Why they didn't use a mid-length system is beyond me.) To counter this, a much heavier buffer and action spring are used on the carbines. A stronger extractor spring is fitted along with the use of a rubber insert and a rubber doughnut to increase extractor tension. The short gas tube and the higher pressures involved also lead to faster gas port erosion.
With the Army's adoption of the new M855A1 round that operates at still higher pressures than the M855 (62 kpsi vs. 58.7 kpsi in a NATO test barrel) there may be new issues. What its long term effect will be on the M4 carbines is not known at this time, but reports are surfacing of cracked bolt lugs and rapid gas port wear. The 62 gr OTM Mk 318 round currently used by the Marine Corp is loaded to current M855 specs and does not cause these problems.
There have also been some stories about M4 carbines getting so hot from sustained firing during a long firefight that they seized up. What happened was that they were fired well past their designed limits (45 rounds per minute in semiautomatic; 90 rounds per minute burst or full auto, with a sustained rate of fire (continuous) of 12 - 15 rounds per minute. This problem would have also occurred with the full sized rifle, as well as other arms under these conditions too. To help alleviate this problem some additional changes have been made to the M4 including a much heavier barrel under the handguard and the new version was fielded as the M4A1. However, if you are going to try and use an any direct gas impingement AR as a SAW or LMG you are going to get disappointed quickly
While the direct impingement gas system can lead to overheating of the bolt and receiver, and fouling, proper maintenance procedures will prevent problems. No firearm is perfect (in spite of what Gaston Glock claims). Even the vaunted AK-47, Glock, and 1911 pistols will malfunction if not cared for. My biggest complaint with the design is the recoil spring in the stock extension design which prohibits being able to have a folding stock that you could still fire the weapon with the stock folded.
Leaving aside arguments over its cartridge's suitability I would have no qualms about carrying one in combat again, although if I could, I'd like to have a purpose designed gas piston version in 6.8SPC or 6.8 x 45 mm.
Like any firearm the AR/M16 platform has its quirks and idiosyncrasies. If you learn about them (as you should with any tool you use) you won't have any problems.
I assume that you know how to completely field strip your rifle.
So now, pay attention!
Since this article deals with the "care and feeding" of the AR platform consider this. Dean Caputo has an acronym to make an AR run.
MEAL
If you want your AR platform to run you got to give it a good MEAL.
M stands for quality magazines that haven't been abused by throwing them around.
E stands for a good extractor that isn't worn and has a good spring.
A stands for quality ammunition. If you have shit for ammo you will have shit for reliability.
L stands for lubrication with the most important place the two gas ports on the side of the bolt carrier.
Keep this in mind as you read on!
CLEANING
While having a clean gun is never bad, you don’t have to
put up with the white glove nonsense with the AR platform. While there are
a couple of gun writers and other idiots who seem to brag about the fact that
they've never cleaned their guns (any gun), the question is WHY would you do that rather
than clean them. Sure, maybe they still (for now) work, but what happens if
that "one more little spec of gunk" seizes things up just as the cape
buff or VCA (violent criminal actor) takes a bead on you. In addition gunk
can work its way into the action and interfere with the functioning of the
safety on many firearms.
Field strip the rifle and remove the bolt carrier and charging handle from the receiver. With the sights on top (to keep cleaner out of the gas tube) swab the barrel and chamber out with a patch thoroughly wetted with your favorite bore cleaner, and allow it to soak, sights up, while you continue.
Remove the bolt from the bolt carrier assembly. Clean the bolt carrier assembly and be sure to remove any carbon from the bolt cam pin slot, the inside of the bolt carrier (that chrome lined hole where the bolt goes), the smaller hole that goes through the carrier, the bottom of the bolt carrier itself, the firing pin, and the inside of the carrier key. You can use a stripper clip to run a patch down inside of the bolt hole in the carrier, or a worn 20 ga brush. Several manufacturers make a dedicated carbon scraping tool for the carrier. A .25 caliber bore brush or a worn .30 caliber bore brush can be used to clean the firing pin hole inside of the carrier, and a solvent wetted pipe cleaner and a worn .22 caliber bore brush to clean the inside of the bolt carrier key. (A new 17 cal brush is ideal.) Note that heavy deposits of burnt on carbon may require extensive soaking in a carbon removing solvent and some scrubbing as nothing will instantly dissolve it. NOTE: Do not use q-tips to clean the inside of the bolt carrier key as pieces of cotton can come off and clog the gas hole. Use a pipe cleaner instead.
However, do not clean, nor put anything inside of the gas tube - it is unnecessary, and you will only stick debris in there that can do no good.
Use your toothbrush to clean the bolt body. Remove any carbon deposits. Avoid excessive use of scraping tools on the bolt tail as it can eventually cause wear and gas leakage. Soaking in carbon remover is preferable.
At this point you can run a wet bore brush through the bore-again (with the gas port on the top). Then attach the chamber brush to your cleaning rod and scrub out the chamber. Using a worn chamber brush, wrap a wet patch around it and insert it in the chamber and turn it a few times. Clean out the locking lug recesses of the barrel extension with cotton swabs. Run several dry patches through the bore and chamber, insuring that the chamber is dry. Note that there are also dedicated locking lug recess cleaning star shaped felt pads that hook onto your bore brush (Brownells #100002057) and an upper receiver cleaning kit with purpose shaped brushes (Brownells # 084000028) that are available to make life easier if you want.
Clean the upper receiver and charging handle. The toothbrush and cotton swabs work well here.Then wipe/blow out any gunk in the lower receiver.
Disassemble your magazines and blow or wipe out any dirt. Do not lubricate the insides of magazines.
INSPECTION
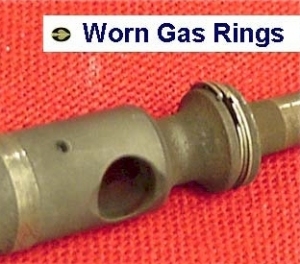
Before reassembling, check your bolt gas rings for any damage. To
check for serviceability, insert the bolt fully into the bolt carrier and suspend the assembly by the rear of the
carrier (preferably over something soft).
If the bolt drops out on its own, you need to change the gas rings
immediately. Next, repeat, but hold the assembly by
just the
bolt head. If the carrier falls of the bolt of its own weight, the rings are
starting to wear and will need replacement shortly.
If it passes these
tests, you are good to go. (While the Colt Armorer's School instructors state
emphatically that the gun will run with one good ring so there is probably no need to get
paranoid about having the slots in the gas rings misaligned, it is probably
a good idea to do so—just in case. An
improvement in the gas rings is the one piece McFarland type ring (Brownells
#100001257)
and if you
replace your gas rings, replace with one of these. They tend to fit a bit tighter
than the GI rings so you may need to fire a couple of rounds for them to seat
in.
|
 |
 |
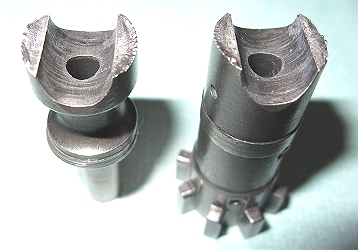
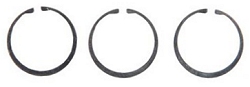
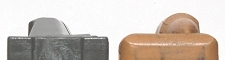
| GI Gas Rings (3 required) | McFarland 1 piece gas ring |
Inspect the firing pin, bolt cam pin, locking lugs, and extractor for cracks and chips and replace if any are found. Pay particular attention to the area around the cam pin hole in the bolt and the locking lugs, especially next to the extractor cutout.
 |
 |
|
|
|
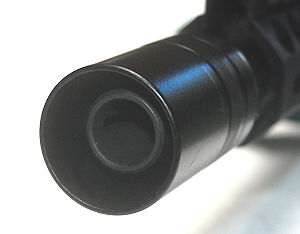
Insert the firing pin into the bolt head and hold forward. Measure the firing pin protrusion. Ideally it should be between .030" to .036", but the minimum acceptable specification is .028 inches.
  |
|
Firing pin in place for measuring firing pin tip protrusion. |
Inspect the carrier key hole for damage, and ensure that the gas tube enters easily into the hole when the carrier is moved.
EXTRACTOR/EJECTOR
It goes without saying that all AR platform rifle should have the new heavy extractor spring (generally identified by its gold color) as well as either the rubber plug in the spring or a rubber D-ring around the spring. Inspect the lip of the extractor for any chips and ensure that moving it in and out takes substantial force. Inspect the ejector button for free movement in and out. As a basic extractor/ejector functioning test, with the bolt removed from the rifle place a fired cartridge under the extractor lip and press against the ejector. The ejector button should move freely in and out with no binding and should have sufficient power to snap the case out of the bolt head. To check the extractor proceed as before but continue to press the case hard towards the ejector. It must not slip out from under the extractor.
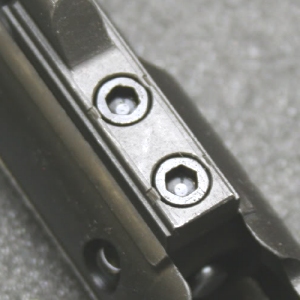
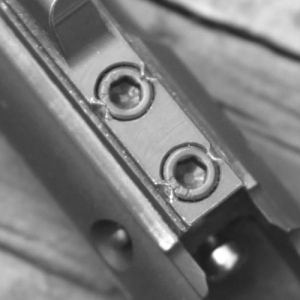
BOLT CARRIER KEY STAKING
One area to inspect, especially on a new AR, is the staking of the bolt carrier
key. Failure to properly stake the key will result in serious malfunctions,
due to gas loss, when the key loosens. A proper staking will physically displace metal on
the key and the screws. Torque specifications vary widely depending on the
source and seem to range from 25 to 58 INCH/ pounds. The
basic GI
spec is 35 - 40 INCH-pounds before staking, but the higher range is preferred.)
The TDP recommends that a thin coating of Permatex #3 Aviation
Form-a-Gasket be placed on the bottom of the key when it is replaced to ensure a
tight seal. Available through Amazon at
http://www.amazon.com/Permatex-80019-Aviation-Form-A-Gasket-Sealant/dp/B000HBM3QQ
 |
 |
 |
|
Brownells staking tool |
Great staking |
MichGuns pocket MOACK staking tool |
 |
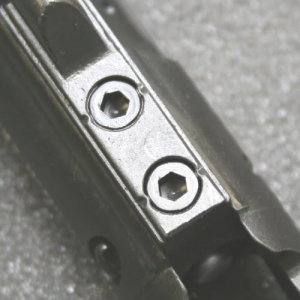 |
 |
| Bad staking | Fair staking | Good staking |
Military TMs require 3 distinct staking points if manually staked.
GAS TUBE ALIGNMENT
If the gas tube is misaligned the bolt carrier won't close easily and the
carrier key and/or the end of the gas tube may be damaged. To check,
remove the bolt head gently slide the carrier into the upper receiver. The
key should seat over the gas tube with no binding or interference. If
there is interference you should either adjust the gas tube position or replace
the gas tube. Brownells offers a gas tube wrench. See tooling list
below.
LUBRICATION
There are a great number of myths that surround the AR
platform, and many of these have taken on the status of urban legends. One very
prominent one is that it must be kept white glove clean and other is that the
gun runs better dry (lightly lubed) than wet (heavily lubed)--a myth perpetuated in the military manuals and
schools. Both of these myths are incorrect. Numerous independent tests and combat/range experience have
proven that the AR platform can run just fine when quite dirty and that it runs
significantly better properly lubed than dry, even in dusty conditions. The
"generous lube" idea was finally (July 2010) acknowledged by the
military. Tests showed that properly lubricated M4s and M16 had 94% fewer stoppages
than lightly lubricated ones even in dusty conditions.
A totally dry gun will usually only run 100-200 rounds before seeing problems. A properly lubed gun in good condition should go well over 1000 rounds. [In my own experience I have watched a test firing involving 3 guns involving some 4700 rounds fired from each over the course of 3 days where the only "lube" and cleaning done, after the initial startup clean and lube, was to put a couple of drops of oil in the 2 holes on the bolt carrier hole and the bolt head and wiping down the bolt and bolt carrier at the end of the day. Not a single stoppage occurred. - Fr. Frog] Note, however, that using a suppressor will cut down the round count drastically, as will firing multiple rapid fire strings or firing with the selector switch on “high volume,” but this can be mitigated by proper and frequent lubrication as mentioned above
The bolt rings function just like the piston rings in your car engine. Keep in mind that when shooting hundreds rounds at a time, the bolt and bolt rings will get blown dry. How long do you think your car would last without lube??
There are certain wear points in the AR platform that need special attention, and failure to lubricate them can cause a stoppage. A good rule of thumb is to look for shiny marks, which indicate metal to metal contact. If it shines, get it lubricated. Note the shiny areas on the bottom and sides of the bolt carrier. These are wear points. The slot that the bolt cam pin rides in is another wear point, as is the chromed hole in the bolt carrier that the bolt rides in.
The entire bolt carrier should get a light coat of lube, but pay particular attention to those shiny areas and put a drop of lubricant down the bolt carrier key. The bolt itself requires a visible coating of lubricant, paying particular attention to the bolt gas rings and the lugs. Put a drop on the ejector button in the bolt face and the extractor pivot pin. After reassembly put a couple of drops in the two holes in the carrier, to lube the rings. Finally, lubricate the sides and bottom of the charging handle and put a little lubricant on the trigger and hammer pins, the sear nose, and hammer notch in the lower receiver. Lightly lube the face of the hammer where it rubs on the bolt carrier.
It is not the brand or amount of lube used, but the placement of the lube that is critical. While the military still uses CLP there are now better choices. Synthetic, rather than petroleum based lubricants are preferred. The general preferences these days are Slip 2000 EWL/EWL30 or MilComm MC-2500 (a.k.a.TW25B oil). A close runner up is 5W20 or 5W30 synthetic motor oil like Mobil 1 or synthetic ATF fluid. For grease on larger bearing areas like the inside of the upper receiver and charging handle) the grease of choice is Slip EWG or MilComm TW25B. While you can use EWG or TW25B on the hammer and sear points, either a little generic automotive moly bearing grease or Brownells Action Lube Plus does wonders for these high pressure points.
Note: Modern lubricants work best if the first time you use them you completely strip all old lube off of the metal and then rub in several coats of the new lube on all surfaces until it isn't visible. Then lube normally. You should not mix different brands of lubricants.
However, in an emergency just about anything slippery will work as a lubricant. Ed's Red is particularly good (especially if you leave out the acetone which most folks do) and in fact has tested better than the issue "CLP." WD-40, 3 in 1 oil, suntan lotion, butter, and even KY and Vagisil (don’t laugh), can all keep you running. You wouldn’t want to use any of these odd ones for the long run, except for possibly Ed's Red, but for a quick fix they beat having a non-functioning gun.
It is a good idea during any break in firing, whether in a class or in combat, to put a few drops of oil into the two gas ports on the right side of the bolt carrier. The lube will get into the gas rings and keep your gun running smoothly. Also, while not really lubrication related, when not shooting you should close the action dust cover and keep a magazine in the magazine well to help keep crud out of the action. Every little bit helps.
A firearm, like any other machine, must be properly maintained. That does not mean being paranoid about the process but rather to take care of those particular areas that affect functioning. A good idea is to keep a gun book and annotate it with a round count so that you can figure out when certain parts--extractor springs, gas rings, bolts and barrels need replacing. Keep it lubed to reduce friction and understand that the more you use it, the more parts may need to be replaced.
RUNNING HOT
A lot of hype makes a big deal of how hot a direct impingement gun can get, with
subsequent warnings of always using "brand X" lube. There have been some stories about M4 carbines getting so hot from
sustained firing during a long firefight that they seized up. What
happened was that they were fired well past their designed limits (45 rounds per
minute in
semiautomatic; 90 rounds per minute burst or full auto, with a sustained rate of fire
(continuous) of 12 - 15 rounds per minute. This problem would have also occurred
with the full
sized rifle, as well as many other arms under these conditions too. However,
those weapons were being used under conditions of fire that practically never
happen even in combat and most likely will never happen in the civilian
world. In a test of 60 rounds in about a minute the bolt carrier
temperature rose to about 120° from an ambient temperature of 82° while the
muzzle temperature was about 285° and the gas tube rose to about 360°.
Following with another 60 rounds at the same cadence the temperatures rose to
about 150° and 400° respectively. However the gas tube rose to over 460°.
These were extreme condition, not likely to be encountered in the real world. If your lube can handle temperatures in the mid 400s you should never have to worry, unless you are facing the zombie hoards, and then you'll have other problems..
REASSEMBLY & FUNCTIONING
CHECKS
Reassemble the rifle and check for proper
functioning. (These are for the semiauto rifles.)
Ensure weapon is unloaded and then perform the following tests
If the rifle fails any of the above tests it need depot level maintenance
Cock the weapon. Holding the weapon with the muzzle vertically drop a section of aluminum cleaning rod down the bore, solid end down. With the muzzle still vertical pull the trigger. The aluminum rod should jump out of the bore. If the rifle fails the above test check to ensure that the firing pin retaining pin is correctly located on the firing pin. You may not have properly seated the firing pin in the bolt carrier assembly before inserting the pin or the firing pin is damaged. Also check that both legs of the firing pin retainer cotter pin are in the hole on the opposite side of the bolt carrier and that one leg isn't bent down inside.
SPARE PARTS
If you are a heavy user of an AR platform the following are
the recommended spare parts you should have available. Note
that some of them are simply commonly lost parts.
Critical Level |
Part |
Quantity
Needed |
Brownells Stock Number |
|
2 |
Hammer spring |
|
078000077 (3 pak) |
|
2 |
Trigger spring |
|
078000088 (3 pak) |
|
1 |
Gas ring set (standard) |
2 |
989015006 (5 pak) |
|
1 |
Gas ring (McFarland type) |
2 |
100001257 Preferred item |
|
1 |
Firing pin |
|
231000005 |
|
1 |
Firing pin retainer |
2 |
430000452 |
|
2 |
Ejector |
|
231000069 |
|
2 |
Ejector / Selector spring |
|
231000068 |
|
2 |
Ejector pin |
|
231000067 |
|
1 |
Extractor |
|
231000070 |
|
1 |
Extractor pin |
|
231000066 |
|
1 |
Extractor spring |
2 |
100004041 |
|
1 |
Extractor buffer |
2 |
078000071 (10 pak) |
|
1 |
Bolt cam pin |
|
234902101 |
|
2 |
Disconnector spring |
|
078000095 (3 pak) |
|
1 |
Complete spare bolt A |
|
See catalog |
|
3 |
Selector/Safety detent |
|
23100102 |
|
3 |
Front / Rear takedown pin detent |
|
231000095 |
|
3 |
Takedown pin detent spring |
|
231000094 |
|
3 |
Buffer detent |
|
231000107 |
|
3 |
Buffer detent spring |
|
231000108 |
|
2 |
Bolt carrier key |
|
430000440 |
|
2 |
Bolt carrier key screws |
2 |
231000075 |
|
2 |
Action spring |
|
078101113
(rifle) |
|
1
- Highly critical parts subject to wear or breakage A
- If complete spare bolt is kept ejector, extractor, their springs, and
pins can go to Level “3” |
|||
|
Generic Part Equivalent
for major |
|
| Carrier Key Screw | 8-32 X 1/4 socket head cap screw* |
| Gas tube and M4 stock nut spring pin | 1/16 x .375 |
| Trigger guard spring pin | 1/8 x .625 |
| Forward assist spring pin | 1/16 x .75 |
| Bolt catch spring pin | 5/64 x .5 |
| * This part may not meet "military specs" but is useable in a pinch | |
AR15/M16 TOOLS
This list includes the major tools needed to do “depot
level” maintenance. Specialty
item have their Brownells stock number listed when available.
Punches |
Brownells # |
|
3/32 bolt latch punch |
080216012 |
|
1/16, 5/64, 3/32, 1/8, roll pin punches |
230112105 |
|
3/16 punch |
354007000 |
|
1/16, 5/64, 5/32, 1/8 Roll pin holders |
080685000 |
| Center punch | 587111222 |
| Front sight taper pin punch | 827530320 |
|
Gauges |
Brownells # |
|
Barrel Erosion gage (PN 8448496) |
n/a |
|
Headspace gage Go (PN 7799732) 1.4636” |
319223464 |
|
Headspace gage NoGo (PN 7799733) 1.4666” |
319223467 |
|
Headspace gage Field (PN 7799734) 1.4696” |
319223470 |
|
Headspace gage Super Field (PN 7799734) 1.4736” |
319418033 (Colt spec absolute max chamber |
|
Bore straightness gage PN 8448202 (.217”) |
Gov't Item |
|
Barrel nut alignment tool (.178” x 4”) |
080216014 |
| Magazine feed lip gage | 080000744 |
| Firing pin protrusion gage (.028/.036) | ,this,false);">080216013 |
| Tool | Brownells |
| ½” Socket wrench handle | Generic |
| 1/8” and 9/64"Allen Head socket wrench tip | Generic |
| Torque Wrench (10 – 80 Foot Pound) | Generic |
| Torque Wrench (20 – 200 Inch Pound) | Generic |
| Set of Allen wrenches | Generic |
| Barrel nut wrench | 231000007 or 080216015 |
| 8” adjustable wrench (2) | Generic |
| Snap ring pliers with pin set | 531460000 |
| Barrel vice | 795015100 |
| M4 stock wrench | 739000010 |
| 3/8” Socket wrench handle with 3/8” socket | Generic |
| Flat tip screwdriver (medium) | Generic |
| Medium ball- peen hammer | Generic |
| Bolt/ejector tool | 080792002 |
| Carrier key staking tool | 080000638 A pocket staker is available from www.mich-guns.com as their "Pocket MOACKS." |
| Gas tube adjusting wrench | 133100015 |
| Optional Tools | Brownells # |
| Upper receiver block | 080000661 |
| Lower receiver block | 080000662 or 080000659 (set of both) |
| Front sight block | 080000252 |
| A1 Sight tool | 078000008 |
| A2 Sight tool | 078000009 |
| Barrel Extension Torque Tool | 080000637 |
| Ejector removal tool | 080792002 |
| Stuck bolt tool (AR15/AR10) | 100023693 |
Locally Made Tools
|
|
Trigger assembly slave pin |
|
Front sight post tool (or commercial equivalent) |
|
Pivot pin installation tool |
|
Front sight detent depressor |
|
Pivot pin removal tool |
While removing the standard handguards can be done (with great effort) by hand, it generally requires 2 people with the physique of the Incredible Hulk to depress the "delta ring" enough to remove the handguards.. There are commercial tools that you can get that make it easy, but they run about $25. Some years ago instructions were posted on the web on how to make a handguard removal tool for just a couple of dollars and minimal effort using 1/4" steel rod and a MAPP or propane torch.. The instructions seem to be difficult to locate these days so I contacted the author, Doug Paul, and have received permission to make his instructions available on my site. Click here to download a 560k MS Word version of the instructions.
Another vital tool to have if you are replacing the front sight assembly is HB Industries "gas block aligner" kit. It consists of a set of one time use plastic pins sized to various gas ports that you use to align the gas port on the barrel with the hole in the sight assembly.
It's available from HB Industries at https://hbindustries.net/store/shop/ar15-gas-block-aligner-5-56mm/
You can also use a piece of spaghetti!
It is also available in a .30 cal version that just has longer pins.
CLEANING &
LUBRICATING SUPPLIES
The following are some cleaning and lubricating products. While not the only possible choices these are
the most commonly recommended.
| Item | Brownells # | NSN/NATO |
| Bore brush .22 caliber | 084401003 (8-32) 084405018 (8-36) |
|
| AR/M16/M4 Chamber brush | 084420003
(8-32) 084405018 (8-36) |
|
| 8-32 thread cleaning rod adapter for GI cleaning rod | 084116362 (allows use of commercial 8-32 brushes with the 8-36 thread GI rod) | |
| Patches .22 caliber 1¼” square | 084116362 | |
| MC2500 (TW25B oil) 2 oz spray | 546100223 | 9150-01-439-1875 |
| TW25B 1.5 oz) | 100003118 | 9150-01-439-0859 |
| MC25 Cleaner 4 oz) | 100003336 | 6850-01-588-4177 |
| SLIP 2000 Lube | 100002873 | 9150-01-551-3542 |
| SLIP EWL | 100003451 | 9150-01-551-9769 |
| SLIP EWL30 | 100018012 | |
| SLIP 725 Cleaner (gallon) | 100002873 | 6850-01-551-9809 |
| SLIP Carbon Killer (gallon) | 100002846 | 6850-01-551-9800 |
| MPro7 LPX | 593000081 | 9150-01-601-4396 |
| MPro7 Cleaner | 945700004 | 6850-01-600-3251 |
| MPro7 Copper Remover | 945000019 | 6850-01-600-3253 |
| Cleaning brush | 100001037 | |
| Lug recess felt stars | 100002057 | |
| "Tooth brush" | 676450001 (can also use an old cut down tooth brush | |
| Bolt carrier carbon scraper | 100001451 | |
| Ed’s Red Bore cleaner | Homemade | |
| Ed’s Red compatible oil | Homemade (ER minus the acetone and paint thinner) |
POPULAR
AFTERMARKET ACCESSORIES
The following are
some aftermarket accessories that are very popular for the serious AR Platform.
While they may not be right for you lots of folks like them. After some
investigation, I believe that the AR accessories market is filled with a lot of
brand name hype to justify high prices. I have compared several red dot
optics mounts ranging in price from about $60 to close to $200. While the
expensive mounts looked beautiful they were no more secure or repeatable than
the less expensive mounts. While your mileage may vary, If you have half a
brain and look, you can get some incredible items at considerable savings.
| Item | Brownells # |
|
Magpul modular full grip kit (with insert of choice) |
100002458 |
|
Magpul enhanced trigger guard (in lieu of above) |
100002198 |
|
KNS Non-rotating pin set |
923000036 |
|
Rubber Butt Pad (M4 stocks) |
100002500 |
|
.050” NM front post (Standard is .072”) |
062111100 |
|
Standard front sight with tritium insert |
892415125 |
|
BUIS (for flat topped receivers) |
100004173
(Magpul) |
|
Railed free float forearm |
100002169
(Carbine) |
|
Rail covers (for Picatiny rail forearms) |
573000028
(Ladder type) |
|
Single point sling adapter |
100004450 |
|
30 rd Magazines |
080000489
(Brownells Tactical) |
|
20 rd Magazines |
078000159
(Brownells) |
|
MagPul Gen III 30 rd Magazine followers (to update Gen II green follower GI magazines and Gen I metal or black follower GI magazines) |
100003500 (3-pak) |
MAGAZINES
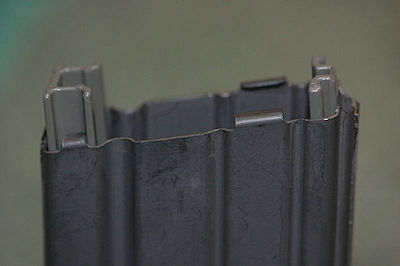
Magazines are the critical part of the rifle. You
should inspect all your magazines for cracked or bent feed lips
and discard any such magazines if found. Pull from service any magazine that generates a
malfunction. You should also mark each of
your magazines with an identifying mark so bad ones can be easily identified.
Magazines that cause occasional malfunctions can be marked and relegated to
training use to improve "immediate action" drills.
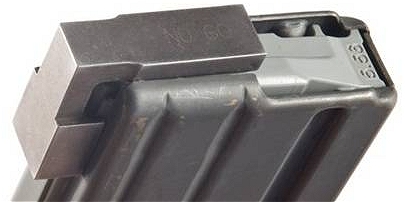
Don't buy junk or unknown manufacturer's magazines. The reasonably priced Brownells (who is a military contractor) "GI" magazines are getting very high marks as are the polymer MagPul "P-Mags," and there are several other excellent brands out there. The Brownells "tactical" version of their magazines" come with the MagPul follower installed. Ensure that all your 30 round magazines have the gray MagPul Gen III or GI tan followers. While the Gen II green followers are useable they should be replaced with the newer followers at your earliest convenience. In my testing the MagPul gray Gen III followers are superior to the new GI tan followers. The MagPul followers have 2% Teflon in their material and are noticeably smoother and more stable in operation. In addition, because of the change in geometry, the tan followers are not compatible with existing springs.
|
M16 30 Rd Magazine Followers |
||
| Shinny metal | Original design |  |
| Dull metal | Vietnam era | |
| Black plastic | Early improved USGI. Used now in 20 rd magaziens. |  |
| Green plastic | Current USGI follower through 2010 |  |
| Gray Plastic | MagPul Gen III anti-tilt follower. Considered by most to be the best follower available. Currently available in several colors. |  |
| Tan plastic | Latest US military anti-tilt. Considered by many inferior to the MagPul. For some strange reason they moved the bullet shaped hump to the opposite side from other followers thus screwing up the "touch" of most magazines | 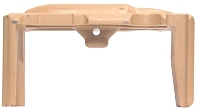 |
 |
 |
|
Front view of followers. New GI on right. Note change in position of the "hump." |
Top view of followers. New GI on top |
The feed lips are a critical part of the magazine. Out of spec or damaged lips will cause malfunctions. There seem to be several different specs for the width between the feed lips. The table below gives three that I know of. The US Military drawing is #8448674 but so far I haven't been able to get a copy.
| DWG 1 (IMBEL) |
DWG 2 (Unknown) |
DWG3 (Enfield) |
|
| Front gap | 11.6
mm +/-0.05 mm .457" +/- .002" (.455" to .459") |
12.09 mm -
.56 mm .476" -.022" (.454" to .476") |
12.09 mm -.56 mm .476" -.022" (.454 to .476") |
| Rear gap | Same | Same | 12.09 mm -.70 mm .476" - .028 (.448" to .476") |
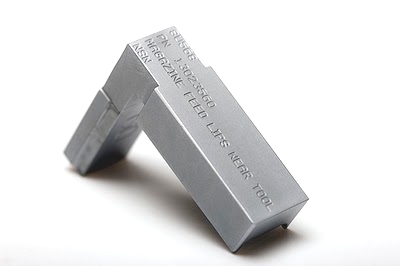
Brownells offers an magazine check gage (#080000744) that can be used to check magazines. It is a copy of the US military gage, part no. 13023560 "magazine feed lips wear tool." The gauge seems to be based on "drawing #2" and is made with a slight taper with .454" at the bottom and .476" at the top.. To use it, remove the magazine follower and spring or push the follower down away from the feed lips. Slide the slotted portion of the lower leg down the back of the magazine from the top of the magazine. The upper portion of the gauge has a very slight taper and should stop just as the gauge has entered the magazine (a "Go" measurement of .454"). If it does not enter the feed lips the magazine should be rejected. The wide part of the gage ("No-Go") is .475" If it enters the fed lips to the top of the gage or if the gage goes completely through the feed lips the magazine should be rejected.
If the magazine is rejected, the feed lips can be adjusted with a Brownells Magazine Feed Lip Tool (#080000314). However, if you repair a magazine I would STRONGLY recommend that repaired magazine NOT be used for critical applications and relegated to training use only. With "plastic" polymer other composite materials magazines the magazines will need to be scrapped or relegated to training use only. Such magazines should be prominently marked to prevent them from being used in critical applications.
 |
 |
| Brownells Gage | Military Gage |
Also check your magazine springs for strength and any damage or corrosion. You can check spring strength by comparing the springs force with a new magazine's.
Magazine upgrade for 20 rd GI Magazines
Magpul says it can't be done, but it apparently can. You can put the
Magpul aftermarket followers in GI 20 rd magazines. You simply need to
trim the legs a bit. If you take off about 7/16th of an inch from the
front leg (the thick one) and about 3/8" from the rear one (about 1/32nd
below the edge of the magazine for both legs) and bevel to match the slant of the mag bottom,
they feed and work smoothly. The picture below shows about how much needs
to be trimmed. This modification has worked perfectly in a bunch of
Brownells 20 rd GI mags. Depending on you magazines you may have o adjust
the length of the legs to allow seat a full magazine.
TRIGGERS
The official specification for the trigger
pull of AR platform rifles is 5.5 to 9.5 pounds depending on the exact
model. In order to provide a modicum of safety and ruggedness the AR
trigger design allows for some camming effect (referred to as positive
engagement). Unfortunately the exact amount varies a lot and the actual
trigger pulls can vary from rather good to really awful. The factories, when tasked with improving the pull usually do a lot
of parts sapping until they get the feel they want.
There are commercial jigs available designed to facilitate stoning AR sears and hammer notches. This is generally a bad idea as the hardness of these parts is very shallow and can be easily stoned off resulting in a trigger pull that starts to vary with use and that can lead to unintentional multiple rounds being fired. The better and more knowledgeable gunsmiths will re-harden the sear and hammer notch after working on them. If someone does trigger work on your AR ensure that they reharden the parts.
There are numerous aftermarket triggers available ranging from modular drop-in triggers to custom made individual components. Many of them are "match" triggers that that are set for very light pulls and that may not hold up under rough duty use, or they may be so critically fitted that reliability may suffer. For "duty use," the Geissele SSF (select fire) and SSA (semi auto) triggers are generally recommended as a non-standard design high-end replacement trigger and they are approved for military duty by the Crane Naval Surface Warfare Center. Geissele's subsidiary, ALG, markets an "Advanced Combat trigger (ACT) that is of conventional design for those organizations that require a "standard trigger." However, in my experience they are highly variable in quality of pull so you may need send them back to the manufacturer to have them tweak their parts.. There are also numerous "original" design aftermarket triggers that are basically a standard production trigger that has been selected by the factory to give a better pull. These can range from very good to worse than the stock trigger so buyer beware and be sure the manufacturer stands behind their triggers and will allow you to exchange it if it is on the bad end.
One thing that can make for more consistent trigger pull is to install KNS Precision's (www.knsprecisioninc.com) non-rotating trigger and hammer pin sets. Not only do they prevent the pins from rotating and wearing the frame holes, the also lock relationship of the hammer and trigger pins which helps get consistent sear engagement. The are available in .154" and .1555" and .170" (large pin Colt) diameters
 |
| KNS pin set with insertion tip |
SCREW/ TIGHTENING SPECS
The table below gives the recommended torque
settings for AR-15/M16 rifles. The data is from TM 9-1005-213-23&P
|
Torque Specs |
|
|
Stock Tube (rifle) |
35-39 FT/lb |
|
Stock Tube Nut (Carbine only) |
38 - 42 FT/lb |
|
Barrel Nut |
30 FT/lb with moly coated receiver threads. Up to 80 Ft/lb permitted to align notches |
|
Flash Hider |
Hand tighten
plus 1/4 turn to align |
|
Carrier Key Screws* |
50-58 IN/lb |
|
Hand Grip Screw |
No spec given other than use lock washer and heavy hand tighten. Depending on grip installed, max screw length is 1.125". Must not protrude into receiver |
| * Colt recommends that a thin coating of Permatex #3 Aviation Form-a-Gasket be placed on the bottom of the key when it is replaced | |
Barrel Nut Note
Failure to follow this procedure may result in the barrel or barrel nut seizing on the receiver.
Before installing the barrel nut clean the threads on the receiver, the nut, and the inside of the receiver where the barrel extension fits, and the outside of the barrel extension. Coat threads of the receiver and nut, and the inside of the receiver and the outside of the barrel extension with a light coating of moly based grease. Assemble and torque to 30 ft/lb. Release and retorque two more times and then tighten until the barrel nut alignment tool drops freely through the notch on the nut. Up to 80 ft/lb of torque my be used to achieve this alignment.
SLINGS
Everyone has their own preference for slinging their
rifle. The two general types are the single point and two point
designs. The single point design allows for easy switching of firing
shoulder while slung. The disadvantage is that when not firing the rifle
dangles and you can cover yourself with the muzzle if not careful. The two
point sling provides better muzzle control and can be tightened to hold the rifle
to the body when negotiating obstacles, but are generally hard to swap shooting
shoulders with.
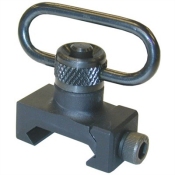
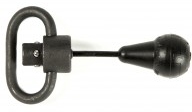
The best single point sling in my opinion is the Magpul "Multi-mission Sling" (Brownell #100009733) and their ASAP (Ambidextrous Sling Attachment Point) adapter plate that allows easy shoulder switching (Brownell #100004450). This sling has the advantage that it will quickly convert to a 2 point sling if desired. Because it is a quick detachable sling in either configuration the best rail front attachment for it (two point configuration) is probably Magpul's "RSA" rail sling attachment (Brownells #100006197).
 |
 |
| ASAP | RSA |
For a dedicated two point sling a lot of folks like the Viking Tactics VTAC slings which can be adjusted to hold the rifle in tight while negotiating obstacles or looser to allow mounting the rifle. They come in a padded (Brownells #100002868) and unpadded (Brownells #100000669) versions and while the padded version is much more comfortable it seems to have a minor drawback, when used on short AR carbines. Unless you remove the second buckle on the butt end and make the butt end portion of the sling as short as possible, the adjusting strap at the front will be way past the front swivel and the keeper won't work. You'll probably have to trim and re-burn the ends of the nylon strapping to get rid of the flapping extras. VTAC offer a "quick release buckle adapter but it is fairly long and might not fit properly with a short rifle and the padded sling. If you have a railed fore end a good arrangement is probably the Midwest Industry's MCTAR-08 Swivel Mount Adapter (Brownells #100001993) which has a button release.
Blue Force Gear (www.blueforcegear.com) offers a very nifty "rapid emergency detachment swivel" that fits standard QD swivel bases.
ZEROING INFORMATION
There are all sorts of zeroing
philosophies for the AR platform. The most efficient zeroing distance
seems to be between 250 - 275 yards. For a comparison of zeroing strategies
click here. For a set of iron sight and red dot
sight zeroing targets, in zipped MS Word format you can click
here.
SUB-CALIBER TRAINERS
If you like to shoot your AR a
lot or do extensive training with it you may want to look into getting a .22 rim
fire conversion unit, or even better, getting (or building) a dedicated .22 rim fire
upper. The conversion units consist of a bolt assembly, magazines, and a
.22 RF chamber adapter that allows you to shoot rim fire ammo through your 5.56
mm. They work quite well and accuracy is good enough for training,
although some combinations show excellent accuracy. The downside of the
conversions is that you are shooting lead .222" bullets down a .224"
barrel which tends to induce leading and you can block your gas tube with lead
shavings although a couple of rounds of ball should blow things clean. I
personally just don't like to crud up a working gun and take a chance with
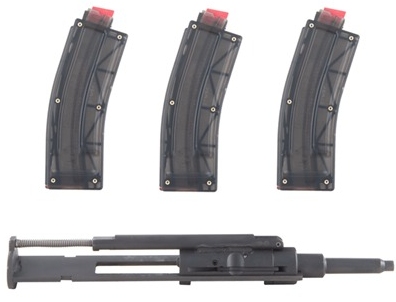
reliability. The conversion I like the best is the one made by CMMG and
sold by them and also marketed by Brownells under their own brand name.
The Brownells unit is available in a package with 3 10rd or 3 26 rd
magazines. [Without going into details avoid the Ceiner brand conversion. You will eventually be sorry if you
do as customer support and care is effectively non-existent. Note that all
these conversions like high velocity ammunition with plated bullets,
exclusively.
 |
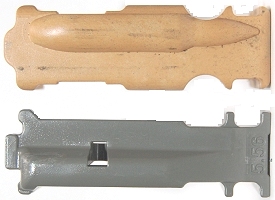
|
CMMG /Brownells Conversion Unit (shown with magazines) |
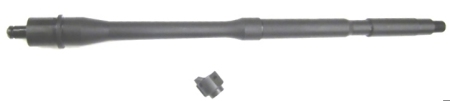
The thing I like the best is to build or buy a dedicated .22 RF upper using a barrel designed for 22 RF. CMMG makes a dedicated barrel and adapter that works with their (and Brownells) conversion unit. Added to a dedicated inexpensive upper receiver topped with an inexpensive red dot optic it will give you hours of enjoyment and practice on the cheap. CMMG and others also offer complete .22RF uppers but it is more fun to build your own. The S&W M&P 22 AR clone is nice and frequently available at great prices, but it is made mostly of plastic and takes proprietary magazines
 |
|
CMMG Barrel and adapter |
For non-cartridge trainers, Umarex (Umarex.com) makes a very nice CO2 "M4" select fire BB rifle (their stock number 2254855). Winchester also offers an "AR" CO2 BB/pellet rifle (their stock number 990004-402). Airsoft rifles can also provide training opportunities for young or beginning shooters.
BLANK FIRING ADAPTERS
There are two different blank firing adapters for the AR platform
rifles. For rifle length gas systems (nominally 20" barrels) the
correct adapter is the M15 red blank adapter, assembly 12002800 with a vent hole
of approximately .0635" (#52 drill). For
carbine length gas systems (nominally 14.5" - 16" barrels) the correct
adapter is the yellow M23 blank adapter, assembly 12597837, which has a larger
vent hole of approximately .073" (#49 drill). The use of the red
rifle adapter on the M4 may damage the carbine. It should be noted that the military proscribes the issue of
any rifle used with blank ammunition for combat use unless the gas tubes are
replaced and the weapon inspected and function tested.
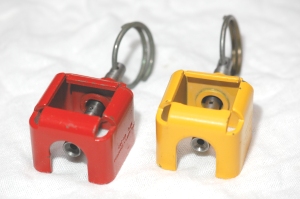 |
|
M15 (M16 rifle) and M23 (M4 carbine) Blank Firing Adapters |
AMMUNITION SPECIFICATIONS
There IS a difference between .223 Remington and 5.56 x 45 mm military
ammunition. While the cartridge cases themselves are identical
(although some dimensions are referenced to different datum points and the NATO
STANAG 4172 has slightly tighter tolerances on some dimensions), with
the exception that military and/or NATO specification rounds (those marked with the NATO
"cross in circle" mark) may have thicker cases and are thus able to withstand
stretching better when fired in loose chambered military weapons (done for reliability
purposes). However, it seems that recently (2012) that almost all cases
(commercial and military) weigh about the same. From the data I have seen the headspace
specifications are identical for SAAMI and military ammunition although,
again, measured
to different datum points and the dimensions of the cartridge cases are the
same. While the standard .223 and 5.56 NATO use
the same headspace gauges, the Colt factory uses a special "maximum field
gauge" that is much longer than the normal field gage to reject rifles.
A caveat
Head space is very important with short barreled ARs and AR
"pistols." They run at higher than normal port pressures which
can result in blown primers if the head space is on the generous side.
| Gauge | .223 & 5.56 NATO | Condition |
| GO (Minimum Chamber) | 1.4636 | Bolt should lock on gage |
| NO-GO (Max Chamber) | 1.4666 | Bolt should not lock on a new barrel |
| Field (Reject) Maximum chamber permitted | 1.4696 | Bolt should NOT lock or only partially lock on a rifle with a used barrel |
| Colt Factory GI Reject Absolute maximum chamber |
1.4736 | Bolt should NEVER close |
The chamber throat dimensions are where big differences are. While there are just minor dimensional and tolerance differences in the body area, the big differences are in the throat areas.
There are actually 3 standard chambers, SAAMI, US GI "NATO," and FN NATO. Commercial SAAMI specification .223 chambers have a much shorter throat, a smaller diameter bullet seat, and less freebore than the US GI military chamber and the NATO chambers. This typically results in the ogive of the M193 Ball bullet touching the ball seat of the SAAMI chamber. When military specification ammunition is fired in a SAAMI specification chamber, pressure can increase dramatically--sometimes up to 10,000 psi. While this should not cause any problems in modern well- made rifles it should give one pause. Conversely, SAAMI specification commercial ammunition when fired in a military chamber gives significantly lower pressures and velocities. Note that M193 55 gr ammunition is not "NATO" ammunition. Only M855/SS109 type ammunition is NATO standard.
The reason the big difference in the FN NATO chamber is that the deeper intrusion of the M856 tracer bullet into the powder space was found under some conditions to cause riveting of the bullet, which gave a steep pressure spike. (This has also been seen with 77 gr and 80 gr match bullets.) Thus the FN NATO 5.56mm chamber has an intermediate 11 degree, 30 minute cone transitioning between the case shoulder and the case neck to help eliminate this problem as marked with the red dot on the drawing below. This chamber is primarily used on the M249 SAW. The US "NATO" chamber used in the M16 rifles does not have this double shoulder but otherwise they are identical.
The data below shows the dimensional differences between the US GI NATO and SAAMI chambers.
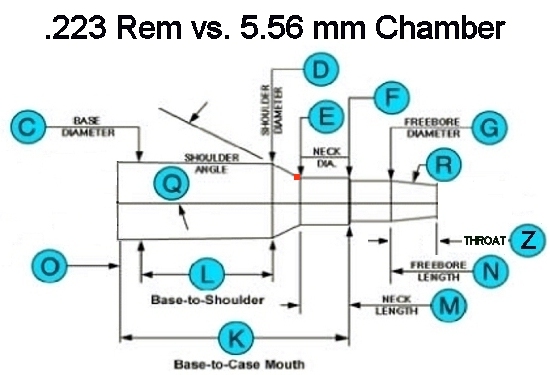
| Legend |
Item |
.223 SAAMI | 5.56
mm NATO US GI |
Difference |
| C | Base Diameter | .3803 | .3803 | 0 |
| D | Shoulder Diameter | .3553 | .3553 | 0 |
| E | Neck | .2550 | .2551 | .0001 |
| F | Neck (Case mouth) | .2540 | .2540 | .0 |
| G | Freebore Diameter | .2240 | .2265 | .0025 |
| K | Base to Case Mouth | 1.7720 | 1.7750 | .0030 |
| L | Base to Shoulder | 1.4338 | 1.4338 | 0 |
| M | Neck Length | .2201 | .2202 | .0001 |
| N | Freebore (Lead) Length | .0250 | .0566 | .0316 |
| O | Datum Point From Breach face | .2000 | .2000 | 0 |
| Q | Shoulder Angle (Deg) | 23 | 23 | 0 |
| R | Throat Angle (Deg) | 3.10.36 | 1.13.25 | - 1.57.06 |
| Z | Throat Length | .0811 | .2693 | .1182 |
|
Dimensions in inches. SAAMI length tolerance = +.0050. NATO length tolerance = +.0040. Diameter tolerance for both is +.0005 Angle tolerance is SAAMI +/- 2 min, NATO is +/- 15 min *The above drawing does not show the double shoulder angle of the NATO chamber. The deeper intrusion of the M856 tracer bullet into the powder space was found under some conditions to cause riveting of the bullet, which gave a steep pressure spike. The NATO 5.56mm chamber has an intermediate 11 degree, 30 minute cone transitioning between the case shoulder and the case neck (at the area marked by the red dot) to help eliminate this problem. Chambers of M16 rifles do not have this double angle although chambers on the M249 SAW do. See the drawing below for the angle detail SAAMI data from SAAMI drawings
in ANSI/SAAMI Z299.4-1992. The shallower NATO throat angle gives a longer throat to the same dimension datum (.215 )than the SAAMI spec. |
||||
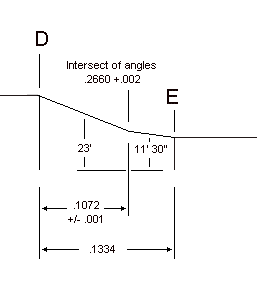 |
|
FN NATO STANAG dual angle detail |
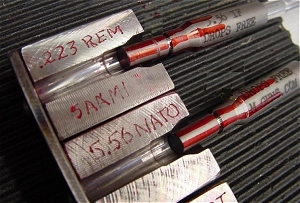
It must also be noted that all 5.56 x 45 mm NATO ammunition (such as US M855) requires a 1:9" twist or faster rifling to stabilize the long 62 gr ball bullet and a 1:7" twist to stabilize the extremely long tracer variation and the 77 gr OTM bullets. The standard twist used for .223 Remington commercial chamberings is 1:12" or 1:14" neither of which will stabilize the NATO type ammunition. There does seem to be a recent push to standardize the 1:9 twist for .223 though. The NATO ball ammunition is easily identified by its green bullet tip.
Determining
Your Chamber Type
Short of doing a chamber cast and measuring the throat the
only sure way to determine your chamber type is to use use the
Michiguns .223/5.56 chamber gage available from http://www.m-guns.com/tools.php
. This $50 tool will stick in the throat of a SAAMI chamber but drop free
of the NATO chamber. If you have a lathe handy you can make your own gage
by turning about 1" of a 13" piece of .250" steel rod to
.226" The measuring tip
should have a clean and fairly sharp, but smooth, edge.
BARRELS
Most "mil-spec" barrels have hard chrome plated bores (as mentioned
in the introduction to this tome), to prevent corrosion and increase bore
life. However, chrome plating is not without its problems. First the
barrel has to be bored slightly oversized to allow for the thickness of the
plating, and second, the plating can peal if damaged. The current solution
to this is to nitride treat the barrels inside and out. This process, similar to
Meloniting™, produces an extremely hard finish that does not alter any dimensions
and which offers much longer bore life as well as greatly increased gas port life. If you are rebarreling your
working AR I highly recommend get a nitrided barrel. One
caveat. They usually need to be thoroughly cleaned before use as there is
frequently a residue in the bore from the nitriding process.
Really short barreled (10.5" - 11.5") ARs are a special case. First, because of the combination of a short gas tube and short "dwell time" (the time of bullet travel between the gas port and the muzzle) setting them up to work well can require some effort, and an adjustable gas block may need to be considered, along with a heavy buffer (at least an H2).
In addition, their muzzle blast can be "interesting" to say the least. The original "shortys" like the XM177 and variations were frequently fitted with a long combination flash suppressor and noise moderator. Unfortunately that unit is considered to be a "silencer" by the ATF. The current non-NFA solution is the use of a "blast can" or "blast deflector" which is a small can-like unit that fits around the standard muzzle break or flash suppressor and directs the majority of the muzzle blast forward, away from the shooter. There are several on the market, but the one from Indian Creek Design (http://www.indiancreekdesigninc.com ) not only works well, but is very nicely made, and reasonably priced.
|
|
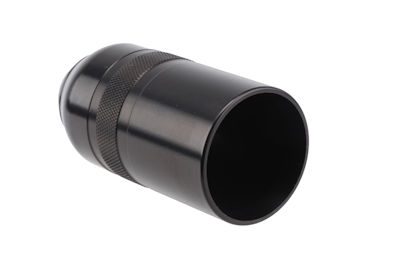 |
|
ICD Blast Deflector |
|
Photo courtesy of ICD
AMMUNITION PRESSURE SPECIFICATIONS
The pressure specifications for SAAMI, M193, and M855 ammunition are given
below.
| Cartridge | Max Avg (KPSI piezo) |
Individual Max (KPSI piezo) |
Port Pressure (KPSI piezo) |
Nominal Proof (KPSI piezo) |
| SAAMI | 55.0 | 56.4 | -- | 71.5 -77 |
| M193 | 55.0 | 61.0 | 14.4 +/- 2 | 70.0 +/- 3.5K |
| M855 | 58.7 | 64.7 | >= 15.3 | 70.0 +/- 3.5K |
| M855A1 | 62.3 | Unk | 17.5(?) | 70.0 +/- 3.5K |
| NATO STANAG 4172 | 55.1 (380 MPa)* | 60.9 (480 MPa) | >= 12.7 | 70.0 +/- 3.5K |
| CIP Commercial | 62.3 (4300 bar) | 71.2 (4945 bar) | -- | 77.9 (5375 bar) |
| * While I do not have any documentation I believe that the SS109 standards now mirror the M855 | ||||
To further complicate things SAAMI and NATO standards use different test barrels and pressure sensing locations. Pressure barrels are basically barrels carefully manufactured to minimum or near minimum internal dimensions. The table below gives basic information on the differences between SAAMI and NATO test barrels.
| Specification |
Chamber Dwg |
Barrel | Rifling & Twist | Transducer
location from breech face |
Gas Port location from breech face |
| SAAMI | Z299.4-1992 | 24" | 1:12 RH Twist 6 - .074 " grooves |
1.259"* | not specified |
| CIP | - | na | na | 1.0" | na |
| NATO | STANAG 4172 | 20" | 1:7 RH Twist 6 - .074 " grooves |
1.830"** | 11" |
| *
If copper crusher is used it is located .75" from
breech face ** Just ahead of the case mouth |
|||||
A word about the STANAG 4172 specification. This NATO standardization specification is designed to ensure interchangeability of ammunition between NATO nations. It is fairly generous and allows for some local variation as long as the 600 meter point of impact does not vary more than +/- 300 mm (11.8") from the point of impact of the reference ammunition (Belgian SS109) with a 300 meter zero. The maximum ordinate for a 300 meter zero can be no more than 250 mm (9.9").
The data below on the M193 and M855 are from ATK Product Manual and are based on a full length (20") M16 test barrel.. The MK262/362 data is based on published sources and assume an 18" M16 SPR type barrel.. Pressure and velocity specifications are based on the NATO 5.56 mm chamber (not SAAMI .223). In practice the charge weight is lot adjusted to meet velocity and pressure spec.
M193 Ball
56 gr - 2 gr; Vel =3250 +/- 40 @ 15' SD 40
Pressure 55 Kpsi (piezo), or Avg + 3 SD <= 61 Kpsi
Port Pressure (M16) = 14.4 +/- 2 Kpsi (piezo)
Propellant WC846 28.5 gr or CMR170 26.6 gr (adjusted to give spec performance)M855 Ball
61.8 gr +/- 1.5 gr; Vel 3020+/- 40 @15' SD<= 40
Pressure 58.7 Kpsi (piezo), or Avg + 3 SD <=64.7 Kpsi
Port pressure Avg +5 SD >=15.3 Kpsi
Propellant WCC844 27 gr or WCR845 27 gr (adjusted to give spec performance)For M193 and M855 equivalent handloads BL-(C)2 748, H335, H4895, TAC, and A2520 are suitable powders
MK262 Mod 0/Mod 1 (These are believed to be the actual 20" bbl specifications)
77 gr Sierra MatchKing (Mod 1 is cannelured lightly); Velocity 2780+/- 40 @15' SD<= 30 (18" bbl)
Pressure 58.7 Kpsi (piezo), or Avg + 3 SD <=64.7 Kpsi
Port pressure Avg -3 SD >= 15.3 Kpsi
Propellant not stated. Can be duplicated with 22.3 - 24.8 gr of TAC, or 23.0 - 25.5 gr AA2520 (adjusted to give spec performance)MK362 Mod 0/ Mod 1 (Currently experimental - works in 1:9 twist bbls)
75 gr Hornady BTHP (Mod 1 is cannelured lightly); Velocity 2850+/- 40 @15' SD<= 30 (18" bbl)
Pressure 58.7 Kpsi (piezo), or Avg + 3 SD <=64.7 Kpsi
Port pressure Avg - 3 SD >= 15.3 Kpsi
Propellant TAC 24 - 25.8 gr, or A2520 24 - 26.0 gr (adjusted to give spec performance. 25.1 - 25.2 gr is what works with current lots of AA2520)
To closely duplicate the MK318 USMC ammunition
MK318 Mod 0 (Close duplicate-actual projectile not commercially available)
64 gr Nosler Bonded Performance (#38135 )
24 to 26 gr TAC or 25 to 27 gr AA2520 to give 3100 fs from a 20" barrel or 2900+ from a 14.5" barrel.
The 62 gr Barnes TSX bullet can also be used which will closely duplicate the Mod 1 version (lead free).
|
Selected NATO Pressure Level Loading Data Using Ramshot TAC, and Accurate Powders, from Ramshot's V6.0 load manual For use ONLY in military/NATO chambers These were developed in a SAAMI chamber to equal what the military ammunition gave as maximum pressure. The maximum pressure of these loads is 62,350 psi in a SAAMI chamber. OAL for all rounds is 2.26" The use of CCI #41 (mil spec) hard primers is recommended. Work up all loads. Test Barrel length: 24” |
|||||
| Projectile | Powder | Min Charge(gr) | Min Charge Velocity | Max Charge (gr) | Max Charge Velocity |
| M193 55 gr FMJBT | A2520 | 25.5 | 3182 | 28.4 | 3489 |
| M193 55 gr FMJBT | A2460 | 24.0 | 3183 | 26.7 | 3424 |
| M193 55 gr FMJBT | TAC | 24.5 | 3159 | 27.3 | 3450 |
| M855 62 gr FMJBT | A2520 | 24.8 | 2894 | 27.5 | 3216 |
| M855 62 gr FMJBT | TAC | 23.6 | 2940 | 26.2 | 3219 |
| Sierra 69 gr MatchKing | A2520 | 23.2 | 2780 | 25.8 | 3061 |
| Sierra 69 gr MatchKing | TAC | 22.9 | 2775 | 25.4 | 3049 |
| Hornady 75 gr BTHP | A2520 | 23.7 | 2764 | 26.4 | 3039 |
| Hornady 75 gr BTHP | TAC | 23.2 | 2730 | 25.8 | 2995 |
| Sierra 77 gr MatchKing | A2520 | 23.0 | 2674 | 25.5 | 2925 |
| Sierra 77 gr MatchKing | TAC | 22.3 | 2650 | 24.8 | 2900 |
As to velocity loss for standard 5.56 mm ammunition from different barrel lengths it is hard to give a definitive answer due to the pressure curves of various powders. I have seen a fairly large variance in data. The graph below depicts the approximate change in velocity vs. barrel length for M855 ball.
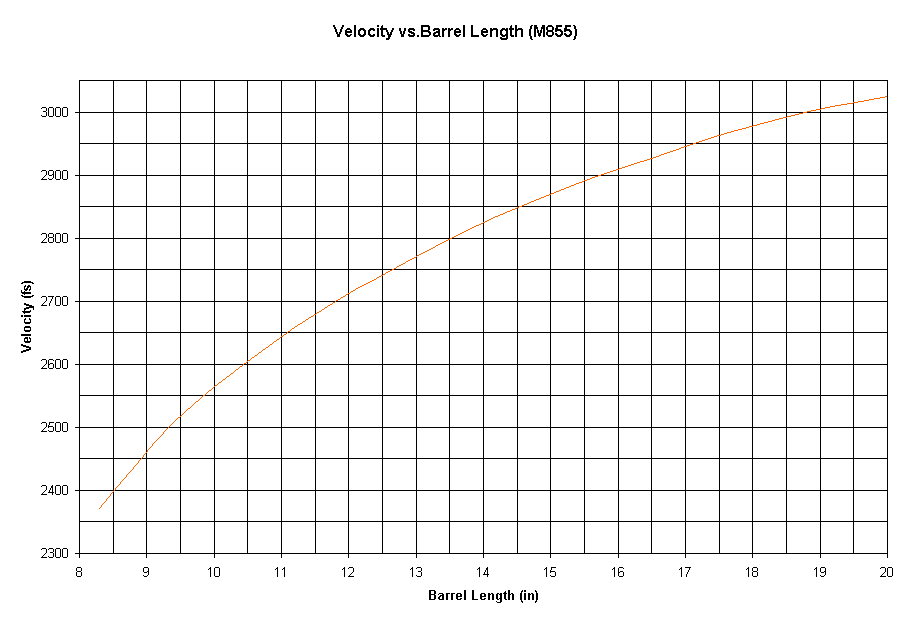
"Your mileage may vary."
|
The
following is an observation and not a recommendation. Most reloading manuals only give SAAMI pressure spec loads. From analyzing various data, IF YOU ARE ABSOLUTELY CERTAIN YOU HAVE A GI / NATO CHAMBER and not a SAAMI chamber, you can increase the maximum SAAMI load by about 1 gr and come very close to GI / NATO pressure specs. Work up all loads slowly. Use only CCI 41 primers. |
RIFLING TWIST RATES
The rifling twist needed to
stabilize a bullet in flight depends on several factors, but primarily on the
length of the bullet. Most commercial .22 centerfire rifle used to come
with a 1:14 twist which was sufficient to handle the relatively short soft point
bullets up to about 60 grains. Military FMJ bullets and modern boat tailed
bullets of about 60 grs or more require faster twists. The original M16s
had 1:12 twists and current ones have 1:7 twists. Most "commercial" AR
platforms now come with a 1:9 twist, but custom twists such as 1:8 are
available. A faster than required twist works fine but a slower than required
twist does not.
The table below, while not absolute, gives a brief summary of the twist rates, the approximate maximum bullet length, and typical bullets. Note that non-lead core bullets are longer for a given weight and may require a faster twist that the weight alone would suggest.
|
Bullet length vs. Twist Rate |
||
| Twist Rate | Maximum Bullet Length (in) | Typical bullets |
| 1:14 | .56 | Most flat based bullets 60 gr or less. |
| 1:12 | .65 | M193 Ball FMJ, Barnes 50 gr TSX, Hornday 60 gr A-Max, SP, and HP |
| 1:10 | .77 | M855 Ball FMJ (useable), Barnes 50 gr VG |
| 1:9 | .89 | M855 (preferred), Hornady 75 gr BTHP, Barnes 55 gr MPG, Barnes 62 gr TSX, Various 68-69 gr BTHP |
| 1:8 | 1.0 | Sierra 77 gr MK, Hornady 75 gr AMax, Nosler 77 gr Competition |
| 1:7 | 1.15 | M856 Tracer, Barnes TSX 70 gr and heavier, Sierra 80 gr MK, M855A1 |
GAS PORTS
There seems to be a variety of "standard" gas port sizes.
Below are the Colt sizes and a table of observed sizes on various brands for
5.56 mm rifles.
|
Colt Gas Port Sizes |
|
| Barrel Length | Port Diameter |
|
10.5 |
.081 |
|
11.5 |
.074 |
|
14.5 |
.063 |
|
16 |
.063 |
|
20 |
.094 |
|
Observed Gas Port Dimensions |
||||
|
Barrel Length |
Barrel Diameter |
Distance from Muzzle |
Min Port Size |
Max Port Size |
|
11.5 |
.625 |
3.850 |
.074 |
.089 |
|
11.5 |
.750 |
3.850 |
.086 |
.094 |
|
14.5 |
.625 |
8.375 |
.063 |
.078 |
|
14.5 |
.750 |
8.375 |
.070 |
.086 |
|
16 |
.625 |
8.375 |
.063 |
.078 |
|
16 |
.750 |
8.375 |
.070 |
.086 |
|
20 |
.625 |
6.875 |
.086 |
.093 |
|
20 |
.750 |
6.875 |
.093 |
.096 |
|
24 |
.825 |
10.875 |
.089 |
.089 |
With the short (<14.5") you really want to run an H2 or H3 buffer.
CRITICAL DIMENSIONS
All data from the Technical Data
Package drawings.
|
Item |
Dimension |
Notes |
| Firing Pin Protrusion | .028 - .036 | Ideally .030 -.036 |
| Bolt Tail Diameter | .258 ± .002 | If less than specified can cause gas leakage and bolt wobble |
| Bearing Ring on Bolt | .5280 ±.0005 | If less than specified can cause bolt wobble |
| Gas Ring Supports | .488 | |
| Firing Pin Hole in bolt Face | .063 | If larger than specified can cause primer flow |
| Ejector Hole in Bolt Face | .116 | If smaller than specified can cause ejector binding |
| OAL FP length | 3.227 Ref | |
| Carrier Key Hole | .172 +.005 | If too large will cause gas leakage. Too small will cause binding |
| Firing Pin Tunnel in Carrier | .157 | |
| Firing Pin Body | .154 - .001 | |
| Gas Tube Tip | .180 Ref | |
| Cam hole in Bolt | .31275 ± .00075 | Out of specification can cause excessive wear and malfunctions |
BARREL WEAR AND TEAR
Because the 5.56/.233 is a
fairly high intensity round, barrel throat wear can be an issue, especially with
heavily used rifles or those fired extensively on full auto. As the throat
wears, accuracy and velocity will decrease. While throat wear is best examined with an
optical bore scope, a good indication of wear can be measured with a bore
rod. This is simply a rod with a tip of a specific diameter that is inserted into
the throat and the depth of penetration is measured by guide marks along the
rod. The military has such rods specifically for the M16 but they are not
easy to come by.
If you start with a known new barrel, you can make your own by turning a 13" piece of .250" steel rod to exactly .2190" for about for about an inch. The measuring tip should have a clean and fairly sharp, but smooth, edge. Remove the bolt and carrier and gently insert the gauge into the chamber until it goes into the throat. With the rod centered in the upper receiver carefully put a mark on the rod even with the rear edge of the receiver. This is your starting point. As the throat wears the rod will go further and further into the throat. When it goes more than about 1/2 to 3/4 of an inch it is time to start thinking about replacing the barrel.
The other area of concern is the gas port, especially with the shorter barreled M4 carbines which operate at a higher port pressure than the longer M16 rifles. The area at the front edge of the port in the bore will begin to erode causing a loss of gas system pressure. This wear is not detectable with a gage and must be inspected with a bore scope.
 |
ACCURACY TEST LOAD
If you want to test the accuracy of your AR, there is a simple,
consistent load that originated with Wally Hart of benchrest fame that can be
used. Use the Sierra 52-gr. or 53-gr. benchrest bullet and 22 grs.
of H4198 or IMR4198; or alternately 23.5 grs. of H322, and anybody's match
primer, in whatever brass you have, but sorted by make or arsenal and year. Seat
to 2.26" OAL. DO
NOT exceed this charge with 4198, as this is a fairly fast burning powder for
this case. As for the H322, this surplus powder varies from batch to batch, and
while the 23.5 gr. charge suggested to me was a mild load with the lot used,
others may run faster, so please be careful.
This is not a high velocity load, about 2950 fps in the full length AR-15, but it is HIGHLY accurate. It shoots well in 7" to 12" twist barrels. If a .223 rifle will not group with this load, it will not group with ANYTHING! (In a full blown benchrest rifle, using GI cases assembled on a Dillon loader, with no benchrest tricks whatever, this ammo averaged 1.39" for twenty-five consecutive 10-shot groups at 200 meters fired the same day, running a round-robin on five different makes of primers.) Primer seem to make no difference either! The CCI450 and Federal 205 seem best , but Winchester WSR is also very good if priced competitively.
AMMUNITION TYPES
As far as can be determined,
ALL .223 & 5.56 mm ammunition from the US, Europe, and Russia is
non-corrosive. Below is a fairly up to date listing of
US Military 5.56 ammunition
|
5.56 x 45 mm |
||
| Number | Type | Identification |
| M193 | Ball | None |
| M195 | Grenade | Rosette crimp w/ red lacquer |
| M196 | Tracer | Red tip |
| M197 | High Press Test | Nickel plated or tinned case |
| M199 | Dummy | Fluted case, no primer |
| M200 | Blank | Rosette crimp w/ purple lacquer, knurled ring on case. Early versions omitted the knurl. |
| M200A1 | Blank | Extended neck for improved feeding like the 7.62 NATO M82. Seen with both black and red paint on crimp. |
| (X)M202 | Light Green tip(?) | 58 grain FMJ "tri-metal" penetrator." |
| M232 | Function test dummy | Black oxide case with deep case mouth cannelure. Same balance as live round. |
| (X)M297/779 | Heavy ball | 68 gr bullet Made by IVI c.63. 779 designation c. '76 |
| (X)M288/780 | Tracer (matches m287) | Made by IVI c.'63 780 designation c. '76 |
| M755 | Sting Ring Airfoil Launcher Blank for use with the M234 launcher system | Rosette crimp w/ yellow lacquer |
| M777 | Ball | Black tip |
| M778 | Tracer, Long Range | Orange tip |
| M855 | Ball, NATO | Green tip, NATO head stamp |
| M855A1 | Ball, NATO, enhanced performance, | Dark bronze metallic tip, NATO head stamp, US Army use. Max pressures |
| M856 | Tracer, NATO | Orange tip, NATO head stamp |
| M856A1 | Tracer, NATO | Tracer version of M855A1. Orange tip, NATO head stamp |
| MK301 Mod 0 | Tracer, Dim | Violet tip |
| M857 | Dummy, NATO | Black oxide case, heavy knurl on case, NATO head stamp, no primer |
| M862 (AA68) | Practice, Short Range | 3.6 gr blue plastic bullet in either a brass or composite case. MV = 4525. Requires a special light weight bolt designated M2. Case rim is smaller than standard case. Also available as a tracer with a red tips bullet. |
| M1042 | Close Range Training Round | Short, rounded red, yellow, or blue projectile. Case has a very deep cannalure near base. requires special bolt kit. |
| M1037 | Close Range Training Round | Blue semi-pointed bullet |
| "M889" | Commercial Incendiary | Blue tip. Made by a commercial outfit called Wolf River Ammunition Plant |
| M995 | AP | .25" Black tip with sharper shaped bullet than normal. Berdan primer. |
| M996 | Tracer, Dim | Violet tip. IR trace. Visible only with night vision equipment |
| Mk 262 Mod 0/1(AA53) | Navy Heavy Ball (77 gr OTM) | Small hole in bullet tip. Mod o has no cannelure & Mod1 variant has cannelure on Sierra bullet |
| Mk 362 Mod 0/1 | Experimental production 75 gr OTM | Hornady bullet. Mod1 variant has cannelure |
| MK 318 Mod 0 | Enhanced Ball, Carbine | 62 gr copper with lead core and open nose OTM projectile. USMC issue |
| MK 318 Mod 1 | Enhanced Ball, Carbine, Lead Free | Silver colored 62 gr copper open nose OTM projectile. USMC issue |
| Experimental | Ball, Duplex | Yellow bullet tip. Contains a 33 gr front bullet and a 34 GR rear bullet. MV 2760. Made by Frankford Arsenal in '63 only |
| Experimental | API | Silver tip with LC91 Nato headstamp. Bullet is based on the M856 tracer but with a pointed steel core and incendiary filler in tip. Not LC production. |
| Experimental | Incendiary | Violet tip. Made in limited quantities c. 60 by Remington for APG's BRL |
| Mk 255 Mod 0 | Reduced Ricochet Limited Penetration (RRLP) | White tip, 62 gr jacketed copper polymer core frangible projectile |
| AA40 (XM556NTR) | Reduced Ricochet Limited Penetration (Federal Ctg L2RP) | Flat tipped with purplish color tip 50 gr frangible projectile. |
| FX SimunitionTM AA91 - Blue AA92 - Red |
Non lethal training round | Combination brass base and aluminum neck area with a colored plastic projectile. Generally with IVI headstamp |
| Hirtenberger SRTA | Limited range
training ammunition (lethal) |
Flat nosed black plastic bullet with bottom visible third jacketed. 21 gr @ 3380 f/s |
| UTM MMR (Man Marking Round) | Commercially procured CQB chalk filled training round | 2-piece silver case with with 6 stab-crimps near base. Large "primer" and a cruciform plastic projectile |
| Unknown designation | Training round | Short round nose jacketed bullet with a small hole in tip and no lead core |
| "Optimum Brown Tip | 70 gr OTM bullet possibly with a brown tip | 70 gr TSX bullet |
| Winchester LE Training Round | Training round | 62 gr open tip bullet and purple tinted, reloadable case |
MISCELLANEOUS INFORMATION
RECEIVER MANUFACTURERS
The following is a listing of who
machines the raw receiver forgings for whom. Things change so this list may not
be up-to-date. If you have more current data please contact me by clicking
here.
Armalite
- Armalite
Aero Precision
Continental Machine Tool
- Aero Precision
JVP
- Stag
Used by early S&W- Rock River Arms
- High Standard
- Noveske (old)
- Century (New)
- Global Tactical
- CLE
- S&W
- MGI (initial batch)
- Wilson Tactical
- Grenadier
- Precision
- Ratworx
- Colt
LAR Manufacturing
- Double Star
- LRB
- Charles Daly
- LAR
- Grizzly
- Bushmaster+ (L prefix)
- Ameetec
- DPMS
- CMMG
- Double Star
- Fulton Armory
- Spike's Tactical
- Noveske (new)
American Spirit
- American Spirit
Lewis Machine & Tool Mega Machine Shop
- LMT
- Lauer (old)
- DS Arms
- PWA
- Eagle
- Armalite
- Knights Armament
- Barrett
- Bushmaster (?)
Olympic
- Mega
- GSE
- Dalphon
- POF (forged)
- Alexander Arms
- Stinger
- Spike's Tactical (old)
- Olympic
- SGW
- Tromix
- Palmetto
- Dalphon
- Frankford
- Century (Old)
S&W
- S&W (Current)
Stubborn Mule Outdoor Supply
Sun Devil
- LaRue
Superior
- Sun Devil forged billet receivers
- Superior Arms
- Lauer (current
CHAMBERINGS
The following is a listing of known chamberings on the
"standard" AR platform.
| "Standard Frame" AR (AR-15/M16) | "Large Frame" AR (SR-25/ M110) |
|
.177
Air Rifle |
.243 Win |
A NOTE ON COMMERCIAL AR
PLATFORM RIFLES
There is a
lot of hype being spread about the lower priced AR platforms these days.
Certain brands, as well as user assembled rifles (a.k.a. "frankenguns"),
are derided by the "experts" who point you to the high priced,
"Mil-spec" name
brands. While you generally get what you pay for, if you know what to look
for you can do just fine without breaking the bank, and from what I've seen the
"high priced" guns, are generally just better inspected before
leaving the factory--but they have plenty of screw-ups too. The problem is that most purchasers of low end rifles (well to be
honest-even many purchasers of high end rifles) know nothing about the care,
maintenance, nor functioning of their rifle, nor do many seem to care. It
is easier to just complain. I would suggest that you check, or have
checked, your headspace if you don't buy a mated barrel and bolt. While I
haven't found any barrel/bolt combinations that were out of spec a couple were
at about the max. Having proper headspace will help alleviated the problem
of blown primers with handloads.
Also note that there is no such thing as a "mil-spec" for the M16 family and the term is simply advertising hype. What there is, is a TDP or Technical Data Package which is a specifications document or more accurately collection of documents that is owned solely by Colt. Colt shares this, on a limited basis, with other contractors that are making the carbines or rifles only for the government or military. When shared, the data can ONLY be used to manufacture contract pieces. Commercial rifle are effectively reverse engineered from those made from the TDP.
I have several acquaintances who, because of budgetary restraints, were forced to buy "low end" ARs or in one case assemble one over a period of about a year. I have had the opportunity to inspect these rifles, to assist their owners, and to train them in the care and feeding of their rifles.
As part of the inspection process, I checked the fit of all parts, screws and other threaded parts torque, spring weights and lengths, extractor and ejector functioning, bolt and carrier fit, and trigger assemblies. Two of the low end ARs were fine out of the box with the exception of being totally free of any lube and one having a little more play between the upper and lower receivers than I like (which has no effect on accuracy). A third one had a weak extractor spring, an atrocious trigger pull, and a loose stock nut. Swapping out the extractor spring and adding a rubber buffer, wire brushing a burr off of the hammer notch, and tightening the nut brought it up to spec. The "frankengun" was checked and other than some issues with torque settings on various parts, and carrier key staking, it was tight and well built as the owner took care with purchasing parts. Using Brownells "GI" magazines, or Magpuls, they are all running fine.
If building a gun from scratch I would avoid (like the plague) buying parts and magazines at gun shows as you have no idea of their history and instead, buy them from a reputable parts house such as Brownells. If you pay a little attention to details, and follow the guidelines and inspection practices in TM 9-1005-319-23P - Unit and Direct Support Maintenance Manual (Including repair Parts and Special Tools List) for M16A2, A3, A4, and M4, M4A1, dtd 2008, you will do just fine. A copy is on the manuals CD.
I recently ran into a fellow at the local shooting area who was having all kinds of jamming problems with his fairly high end AR and I offered to take a look at it. Besides a very weak extractor spring, and enough carbon fouling to start a pencil factory, he was using crappy surplus magazines he picked up at a gun show. I dug out my range bag, showed him how to properly clean the rifle, replaced his extractor spring and stuck in a rubber spring buffer. I then had him fill up a couple of my spare Brownells "GI" magazines with his ammo. He ran through 90 rounds without a single problem. He was amazed. He ordered a bunch of the Brownells magazines from me and trashed all his junkers. Last I heard he was still a happy camper.
There is also a lot of hype from armchair "experts" as to the need for specially coated, expensive parts and accessories, and magic lubricants Pay them no attention. Use good quality parts from a known source, check for proper assembly, lubricate, and go shoot.
A CHECK LIST
If you would
like a copy of a comprehensive safety and functioning check list for the AR
platform, click here.
A NOTE ON THE
"ACCU-WEDGE"
Several
manufacturers offer a little rubber "wedge" to remove play between the
upper and lower receiver, touting increased accuracy. Tests conducted by
several groups including Armalite, the Army Marksmanship Training Unit, and myself have
shown absolutely no effect on the accuracy of rifles so equipped. However,
people feel better about their rifles with less slop.
The Army MTU did note however that when there was no noticeable play that the shooters voiced more confidence in the rifle. In addition, it was noted that in many cases that assembly and disassembly of the rifle was made much more difficult because the use of the "wedge" greatly increased the effort need to lock and unlock the upper and lower receivers, and that may contribute to the wear of the pin hole in the upper and lower receivers.. If you have a particularly loose upper/lower fit go ahead and use a wedge if you like. However, you should gradually sand a little bit off of the bottom of the wedge until you can close the receiver without undue force.
RECEIVER EXTENSION TUBES (aka "Buffer Tubes")
There are two different sizes of the receiver extension tubes in use. The drawing below illustrates the differences
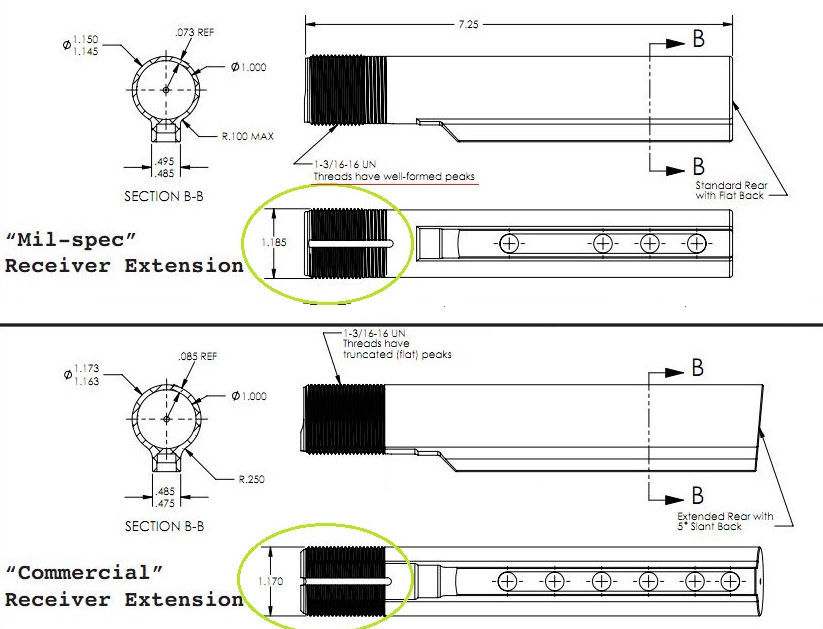
NOTES ON BUFFERS
AR platform
rifles use a weighted buffer along with the action spring to slow down the
cycling of the action. Made from machined aluminum tubes they contain
reciprocating weights and pads. The buffer for the fixed stock rifles
buffers weigh about 5.2 ounces and are about 5½ inches long . The carbine buffers come in
several weights and are about 3¼ inches long.
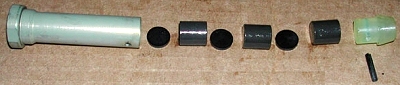 |
|
Disassembled carbine buffer showing weights and spacers. |
There seems to be a plethora of under buffered (too light) carbines in the commercial sector. One reason given for this is that most people are actually using ammunition loaded to SAAMI pressure levels rather than military levels so the carbines function "better" with the light ammunition. Unfortunately this can lead to battering of the rifle when fired with full power military ammo, especially if full auto fire is used or a suppressor is attached. Weigh your carbine buffer to see what you have. Most knowledgeable AR mechanics recommend that you use at least a 4 ounce or heavier (H or H2) buffer instead of the lighter standard ones. Blowback operated AR pistol caliber arms use different buffers that weigh between 5.6 and 8 oz depending on the caliber. There are commercial "low mass rifle buffers available that some competitors use to supposedly get faster cycle times believing that it gives them some kind of speed advantage, but I would not use them.
There are some cheap plastic-tubed buffers filled with lead shot that occasionally show up. If your rifle has one of them, immediately replace it with an aluminum one.
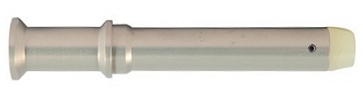 |
|
|
|
Rifle Buffer
Standard
5.2 - 5.4 oz |
Carbine Buffer
Commercial
3.0 - 3.5 oz |
Pistol Caliber Buffers
|
|
Custom commercial buffers for non-standard calibers can range up to 11.5 oz depending on the caliber and gas system |
||
CHARGING HANDLES
Modern doctrine teaches that one keeps one's firing grip
on the rifle and run the charging handle with the support hand. While this
procedure limits the number of grip changes you need to do, it
does stress the charging handle and particularly the latch pin. While
failures are rare they do happen.
When inspecting your rifle during cleaning, check the charging handle extension for straightness, cracks near the front angle, and the handle, and inspect the fit of the latch and its roll pin. There are several after market strengthened charging handles that are more robust but the one most recommended is the Bravo Company's "BCM Gunfighter" charging handle which is designed to take the stress off of the latch pin, and incorporates a strengthened, billeted constructions to resist twisting. In some limited testing the BCM was noticeably stiffer and resistant to bending or twisting. They are available from Brownells and other sources and are available with 3 different latch sizes. If you are the worrying sort you may want to look into these improved changing handles.
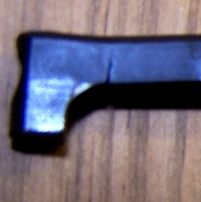 |
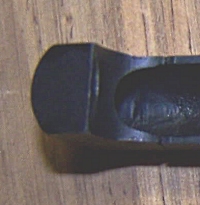 |
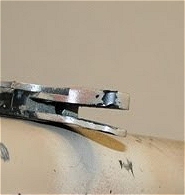 |
 |
| Failure at front end | Broken latch pin | Broken head | |
ACTION SPRINGS
Rifle action
springs should have a free length of 11 ¾ in. (29.85 cm) minimum to 13 ½
in. (34.29 cm) maximum. Carbine action springs should have a free length
of 10 1/16
in. (25.56 cm) minimum to 11 ¼ in. (28.58 cm) maximum. Do not interchange
springs.
"SLAM
FIRES"
A "slam fire" is when the round being
chambered fires when the bolt closes. There have been some reports of
these in ARs, but with surprisingly few details provided. Slam fires are usually the result of high
primers and possibly long firing pin protrusion. High primers just aren't in
reloads, they happen in factory ammo too. I have several factory .223/5.56,
.308, .45ACP, and .40 S&W rounds with what I'd call high primers. While they
occur, I have a feeling that many of the "slam fires" are actually caused by having fingers on the trigger when dropping
the bolt. I did some testing on slam fires and the AR and you can see the
results at www.frfrogspad.com/arslam.htm.
ACTION
STRENGTH
From the data I have been able to find the physical bursting strength of the
typical AR action is about 120 kpsi as the bolt locks into the barrel extension
rather than the receiver. The problem is that the brass cartridge case will fail long before that
point (brass cartridge cases generally have a pressure limit of about 75-85 kpsi)
and the escaping gas will split the aluminum receiver in a catastrophic failure.
MANUALS
I have available a CD that contains the following
manuals and files of interest for AR/M16 owners. If you own an AR you
should have this CD. Note that this CD can
not be shipped outside of the United States.
TM 9-1005-319-10 - Operators Manual for M16A2, A3, A4, and M4, M4A1
TM 9-1005-319-23P - Unit and Direct Support Maintenance Manual (Including repair Parts and Special Tools List) for M16A2, A3, A4, and M4, M4A1, dtd 2008
TM 9-1005-249-10 - Operators Manual for M16 and M16A1
TM 9-1005-249-23P - Unit and Direct Support Maintenance Manual (Including repair Parts and Special Tools List) for M16 and M16A1
TM 9-1005-309-10 - Operators Manual for M231 Port Firing Weapon, dtd 2010
TM 9-1005-309-23P - Unit and Direct Support Maintenance Manual (Including repair Parts and Special Tools List) for M231 Port Firing Weapon
TC 3-22.9 Rifle & Carbine Marksmanship
M16 Armorer's Checklist
MIL-R 63997B (M16A2 specs)
MIL-C 71186 (M4A1 specs)
MIL-C 70599A (M4 Specs)
GI M16A2 and M4 Zeroing targets
MCRP 301A - Marine Rifle Marksmanship
Zipped Archive of special zeroing targets.
MEUSOC Qualification Course
M16/M4 Malfunctions, Corrections, & Drills
A PDF version of this web page
STANAG4172 5.56 x 45 mm NATO Ammunition
Zeroing the AR-15/M16/M4
Canadian C7 Rifle and C8 Carbine manual
SOPMOD Program Presentation
Making a Handguard Tool
TM 9-1240-413-13&P M68 Aimpoint sight
TM 9-1005-342-23&P M110/AR-10
TM 9-1005-342-10 AR-10
Small Arm Integration Book
Ballistics tables for M193, M855, and MK 262 ammunition
TM 9 -6920-363-12&p 22RF conversion for M16
Lower Receiver Blueprint
M68 Zeroing Target
Several Powerpont presentations
Malfunction Correction
Marksmanship Fundamentals
Red Dot Zeroing
Zeroing
M193, M855, and MK262 Ballistics tables
A comparison of Magpul magazines
Colt AR15 .22 RF Conversion Unit
M855A1 Ammunition Presentation
M16-M4 Shooting Methods
M16 Zeroing Methods and Training Aids
M16 Technical Data Package
1960 APG AR15 Test Report
Most of the Technical Data Package
If you would like a copy of this information shipped via 1st class mail, send $20 in cash, check, or MO to
John Schaefer
1365 S. Saddleback Dr.
Cottonwood, AZ 86326
If you have other relevant AR/M16 manuals in PDF format that you think should be included on this CD, if you send them to me, by clicking here, I will send you a free CD with your addition included.
Please email comments or questions to Fr. Frog by clicking here.
| Back to Fr. Frog's Homepage |
Disclaimer
As far as I know all the information presented above is correct and I have attempted to ensure that it is. However, I am not responsible for any errors, omissions, or damages resulting from the use or misuse of this information, nor for you doing something stupid with it. (Don't you hate these disclaimers? So do I, but there are people out there who refuse to be responsible for their own actions and who will sue anybody to make a buck.) I'm sure that there are some "experts" out there who will disagree with the information presented here, but it works in spite of their opinions. I don't really care what they think.
![]()
Updated 2023-12-30 @ 1400